
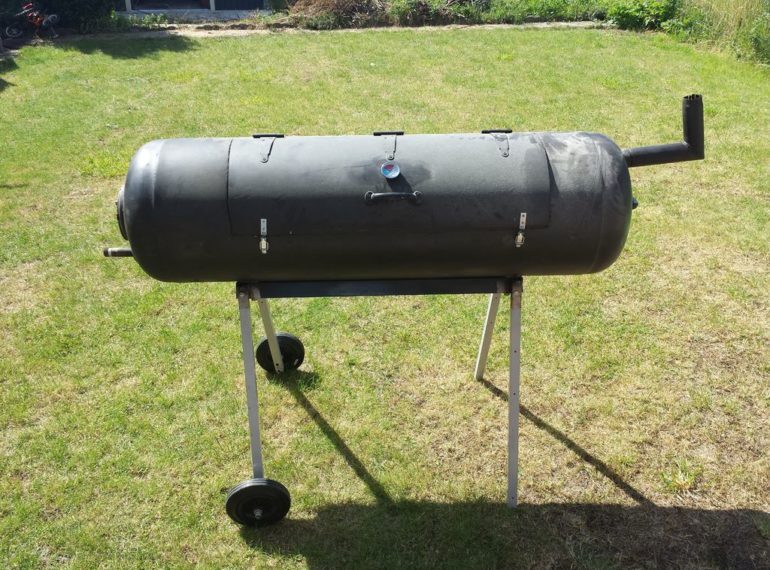
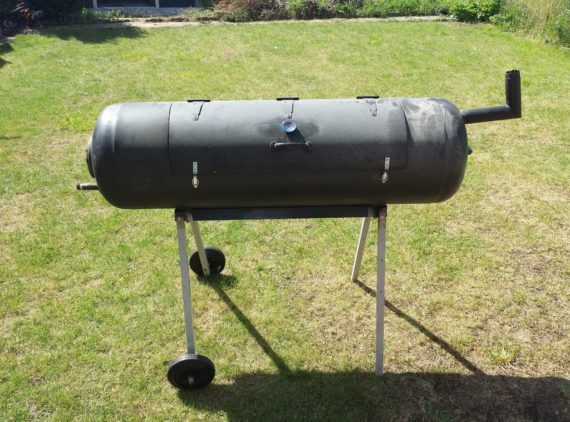
Instead of turfing out your old water heater, why not create your massive bbq, with little to no additional cost. So what do you need to make the ultimate ‘cook out’ BBQ for your friends and family to watch you in awe as you cook enough food to feed a baseball team? We’ve outlined a super simple DIY project for a BBQ made from an electric water heater.
Materials you will need for your BBQ made from an electric water heater
– Old 200L electric water heater
– Rivet
– Hinges
– Handle
– Thermometer
– Wheel
– Metal hooks
– Corner steel
– Heat resistant black paint
To effectively undertake the transformation you will need tools such as:
– A crow bar
– Hammer
– Cordless drill
– Welder
– Grinder
– Rivet gun
– Painting equipment
– Safety equipment
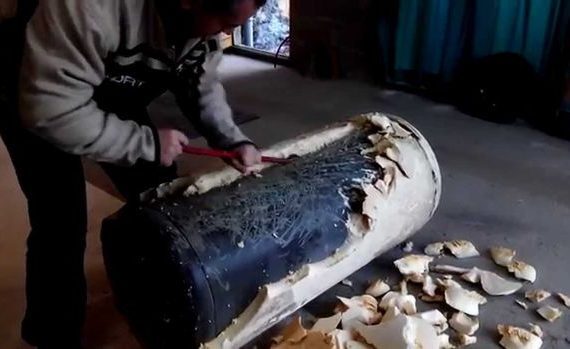
Step 1 – Strip your water heater back to basics
Your old electric water heater underneath all the insulation and casing has a wonderful metal drum, perfect for your new BBQ – now, let’s go inside and rescue it!
Using a crowbar, hammer and other tools, remove the insulation and casing around the electric water heater box so that it is all stripped back to usable condition.
With a hand grinder, remove all the paint on your old water heater leaving a fantastic, shiny drum – you should be able to start to see your cookouts taking place from here on in.
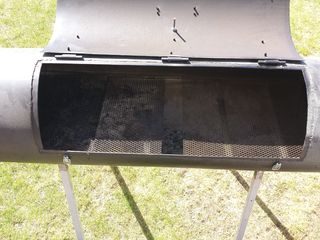
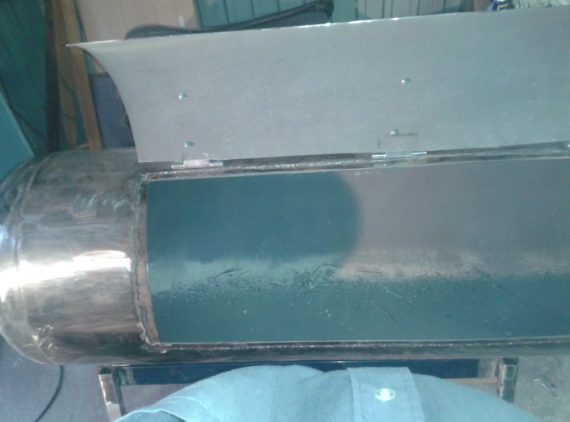
Step 2 – Cut your lid for your BBQ
With everything removed, cut out your entry way into the holy pit of your BBQ using your grinder. To get the positioning correct, before you open up your door, drill your holes and rivet the hinges, door handle and two metal hooks to keep the door closed when you are roasting.
Once the door is cut out, then weld the door bracket to reinforce it. Now stand back and watch your awesome BBQ start to take shape.
Step 3 – Put some legs on your BBQ
Using some old metal bedsprings, cut to shape and weld the wall brackets to the body of your BBQ. The legs will provide stability to the frame of the BBQ and add a stable platform to attach your legs.
Next, solder the feet – again sourced from an old bedframe, so they should be free – to the bracing, then attach it all together with 10mm screws to ensure they stay in place.
If you want to take your BBQ around the yard or to a neighbours house – which you undoubtedly will have to do – weld on an additional handle at one end, so when you add wheels to one of the ends, you can easily move your BBQ where ever it needs to go.
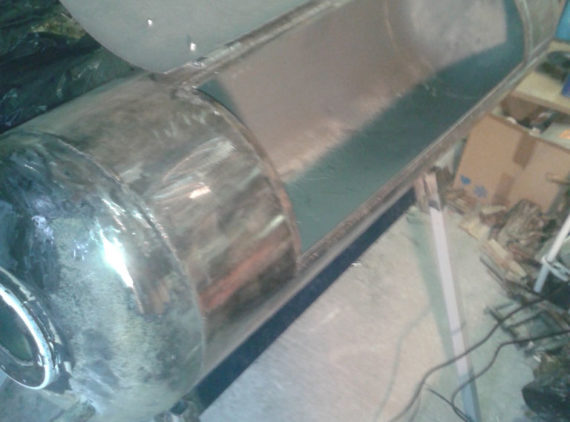
Step 4 – Add the hot plate and chimney
With the drum reinforced and on legs, you can now attach the support brackets for your grid across the entire length of your drum – this will provide additional strength, stability and allow you to sit your grill plate on top of a stable platform – while allowing you access to add more fuel to your fire if required.
You can have the grid made to measure, which will save you time and a lot of heartaches, or you can make it yourself with a little DIY. The grid will be your cooktop, so weld and rivet this over the entire length of the cooker and set in place.
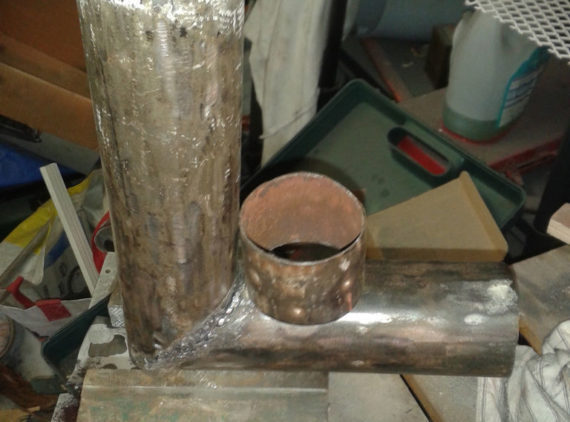
Your chimney is created from a pipe, which can be cut into the desired shape/length depending on your needs. Make sure you have enough length to ensure your massive BBQ can chug along nicely and you don’t smoke out your backyard.
Cut an air inlet into the base, with a grade and plate to allow air in as you do or don’t need it for your BBQ outings.
Step 5 – Paint and prepare your BBQ for use
With your BBQ essentially ready, now get your heat resistant paint, black ideally so it doesn’t show up the burn marks and paint your BBQ all over.
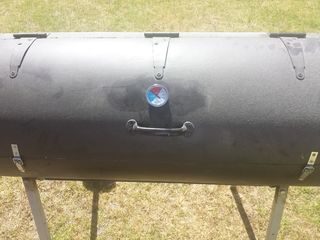
Now your BBQ is ready to go, however, you can cut a whole, insert and weld in a temperature gauge, to allow for the perfect roast or brisket to be prepared.
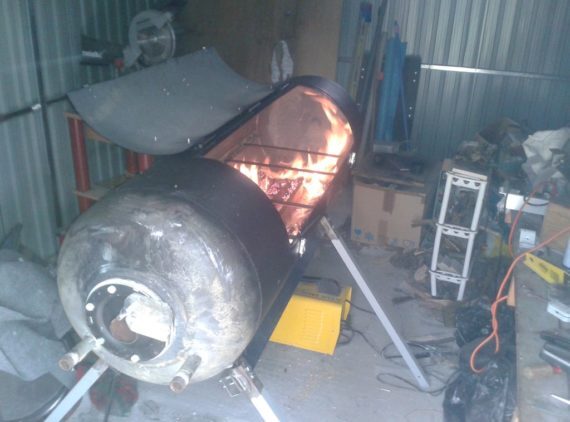
Once you have everything ready to go, do a test run to ‘burn in’ your new BBQ to ensure the paint, metal and all the components have been put through their paces and won’t spoil the taste of the meat when you cook it.
You can now have your friends, family and whomever you want to show up over to provide the ultimate cookout for as many people as your converted hot water system can handle. There is no question you will turn heads!
Like any DIY project, you should always use your safety equipment when using power tools, welding equipment and working with metal in general – the last thing you need is a trip to the emergency rather than a trip to the supermarket to get your prime rib!
Whether you have a small DIY project or a big one, we have the tools you need to get the job done. Listing tools is easy!
Do you own a bunch of tools at home, gathering dust that you hardly ever use? Instead, you should be letting them make you money by renting them out to people in your area. With ToolMates Hire you can now hire your own tools out whenever they’re not in use.
Simply register, add a tool, details and photo, add the dates the tool is available and confirm, and your tool is listed on ToolMates Hire as available.

Leave a Reply