
Are you fed up with the heat during summer or keen to create a portable air conditioner without having to pay ridiculous prices? A portable DIY air conditioning cooler made from an Esky or cooler box could be the answer to your prayers. Made from an Esky or cooler box, this portable air conditioning cooler is just the thing for chilled out sessions on the deck or drinks in your mate’s garage and is easy to cart around and is super cheap to create. In this article, we step through the process of creating your very own portable air conditioning system simply using an easy to find cooler or Esky and a few cheap pieces of equipment.
Materials needed to create your air conditioning cooler include:
- AC fans – either from an air conditioner shop, Bunnings or some you have lying around in your garage
- Extension cord
- Esky or cooler box
- Coil set up from an old fridge – keep an eye out for council clean ups and you should be able to find one
- Old air purifier fan or a 6-inch fan
- Toilet drain flange
- Shower drain
- Fountain pump
- 7-inch duct elbow
Tools needed to build the air conditioning cooler:
- Screwdriver
- Hammer
- Drill
- Angle grinder
- Jig saw
Step 1: Gather all the pieces you need to create your air conditioning cooler
There is a fair bit to building the cooler, so take the time to gather everything together and make sure it is all ready to go for when you start assembly. You’ll need quite a few parts so keep an eye out during council clean ups so that you can save heaps of cash by collecting most of the pieces without having to fork out any cash.
Step 2: Prepare the fans for your cooler
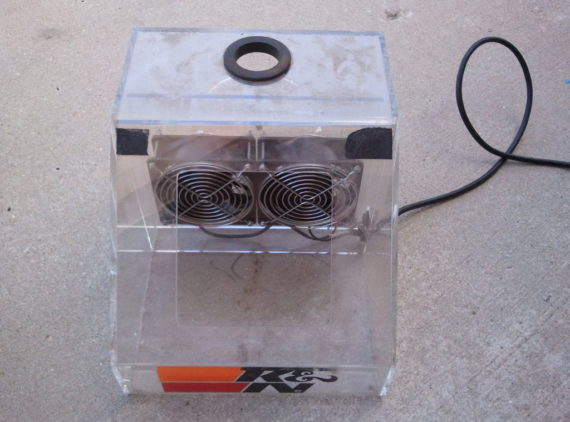
The first step is to get from fans ready and raring to go. Take apart the air purifier and remove the motor as well. Next, you will need to mount the motor, to do this you will need to use the angle grinder to ground away at the plastic but be sure to leave the mount holder so that it eventually fits into the shower drain.
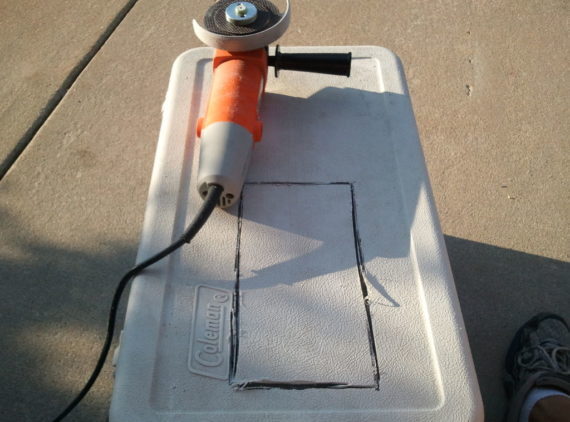
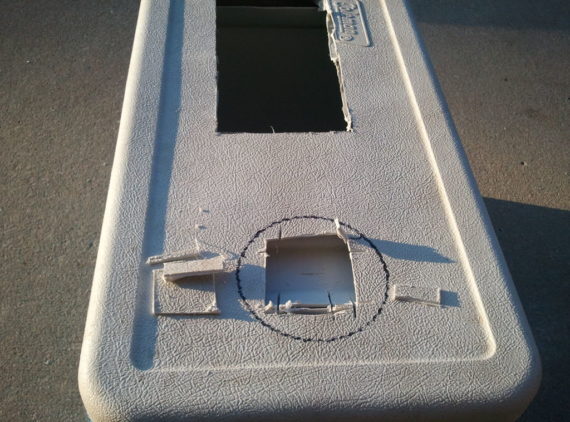
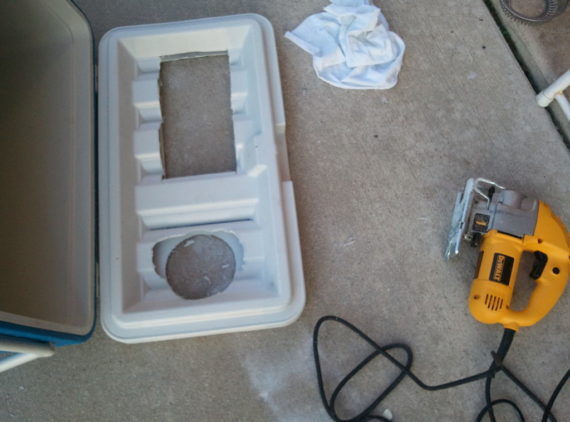
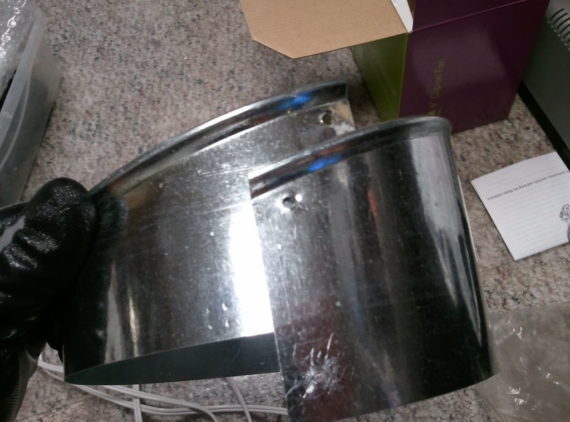
Step 3: Cut your cooler box
The next step is hacking into your cooler box so that it can take the fans and all the elements of your air conditioning. For this step, we took some cardboard and outlined the hole so that it was slightly bigger than the fans, however, make sure the hole is smaller than the surrounding plastic so that it fit snuggly. You will also need to cut a hole for the toilet flange to set as well. When you have completed the steps above next, you will need to remove the underside ribbed portion of the cooler lid to give you some more space to work with.
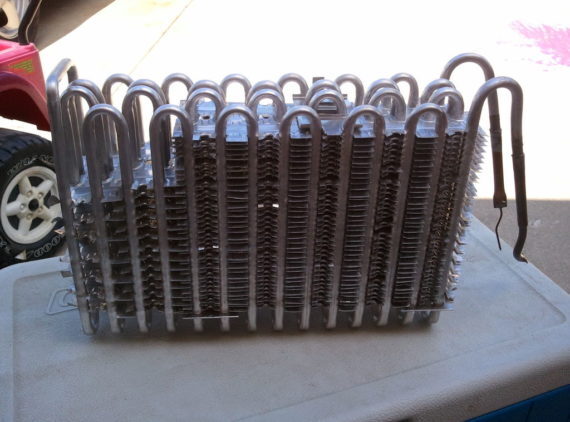
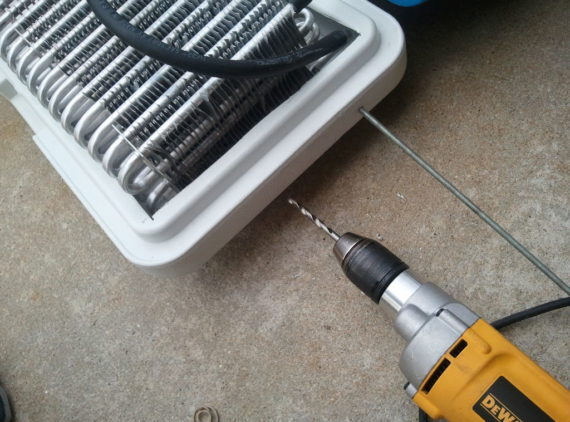
Step 4: Set up the fins, fans and flange ready to insert into your cooler box
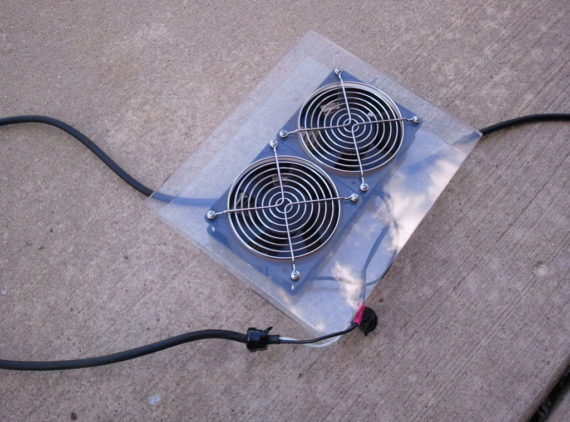
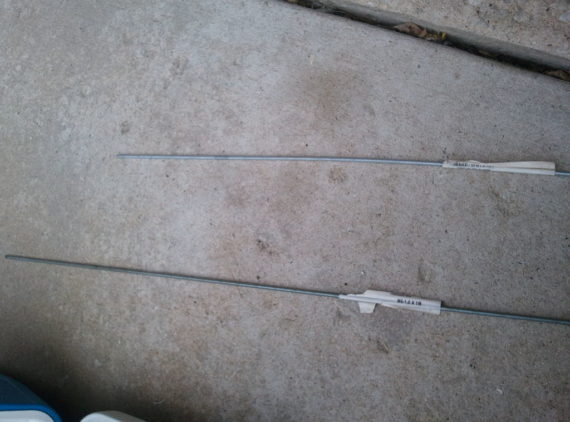
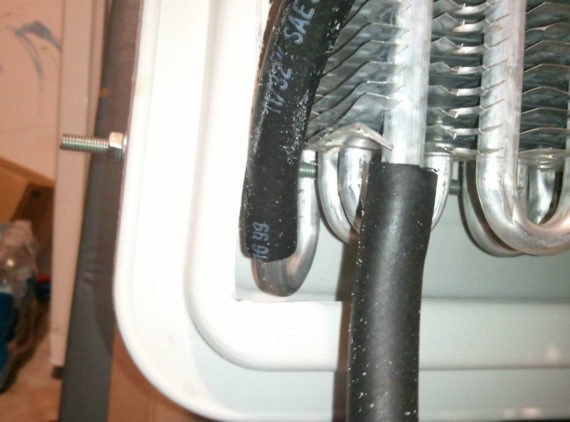
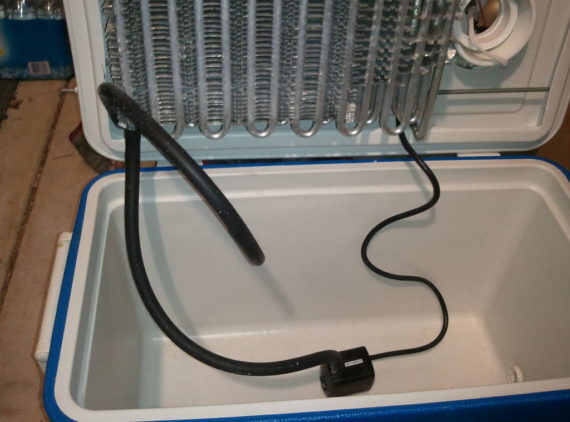
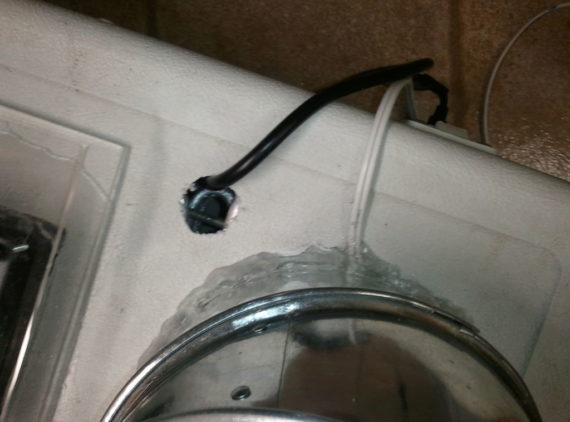
Here’s where the project starts to get a little technical. Next, get your PVC hose and hook it up to the trimmed end of the fins. You will need to have one hose for the uptake and one for the outtake, so be sure to get two hoses when you are fishing around for parts. The pump should sit at the bottom of the cooler and include suction cups. At this point, you will also need to cut a hole into the top of the to provide access for the power cord, which you will need to power up your awesome new air conditioning systems. To set everything up, hold up the radiator fins in the lid using some 6MM threaded rod and cut it to the exact length across the lid, threading it all together to hold the unit up. Then you will need to mount the fans and the flange.Finally, cut a hole for the power cord from the fountain pump and add some caulking to seal everything up.
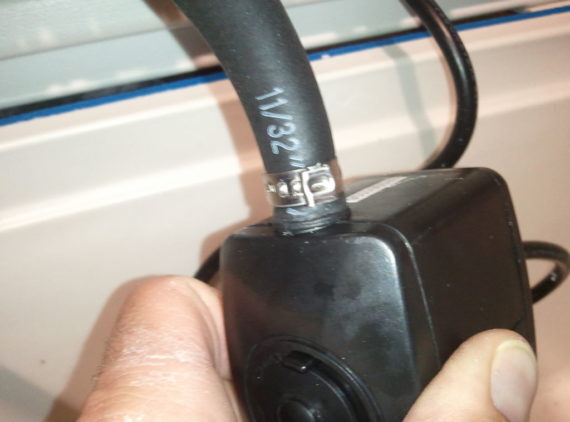
Step 5: Hook up the pump inside your cooler
Now you’re ready to hook up the pump inside your cooler. We did this by cutting off the ends of the fins and hooking up the PVC hose. Then connect the end of one of the hoses to the pump, which will be mounted on the bottom of the cooler with suction cups to the power outlet and safely secure with a hose clamp so that it is firmly secure.
Step 6: Add the drain and exhaust fan to your cooler box
You’re almost there. Now you will need to take apart your air purifier and use your angle grinder to get rid of any extra plastic. Once you have trimmed the air purifier to fit across the drain opening, you’re set to go. Just ensure you create enough of a tab to that you can reuse one of the drain screws and mount it as needed. Then once you have done this, you can mount the fan and glue it securely in place to the speed control knob. Finally get some liquid electrical tape and coat all the edges of the connectors to make sure it is all nice and safe.

Step 7: Add the final touches and get ready to be cool
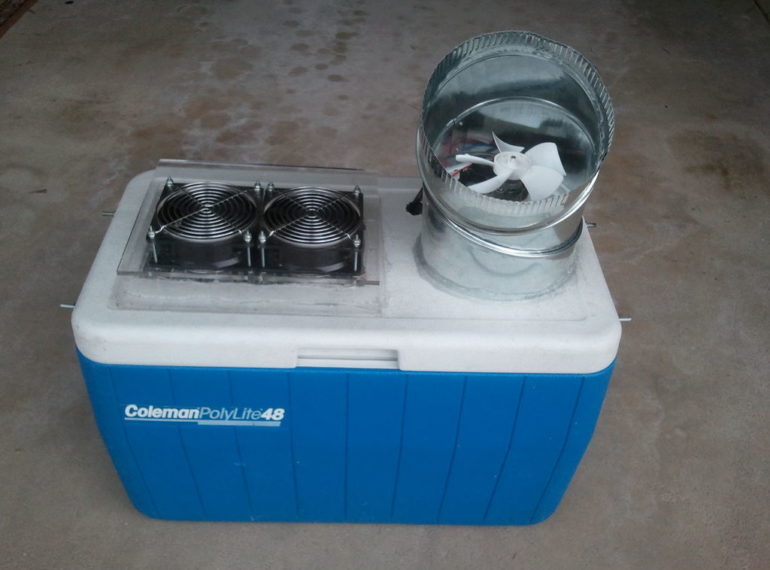
In this final step, you’re going to want to add the 7-inch adjustable elbow. Simply cut the bottom section open, drill out the rivets and fit the elbow inside. Then you will need to cover the rim of the flange with putty and mount the fan and drain with the new ductwork. Now to finish it all off, you will need to drill out the bottom section so that it fits perfectly and use two sheet metal screws to hold it all together. It’s time to head out and fill your cooler box with cold water and ice and sit back and chill. As a side note, you do have the option with this portable air conditioning cooler box to add in a bigger pump if you think the smaller pump won’t suffice. It could be an idea to incorporate this or upgrade down the track if your cooler box doesn’t give you the cooling you’re after. Whether you have a small DIY project or a big one, we have the tools you need to get the job done. Listing tools is easy! Do you own a bunch of tools at home, gathering dust that you hardly ever use? Instead, you should be letting them make you money by renting them out to people in your area. With ToolMates Hire you can now hire your own tools out whenever they’re not in use.
Simply register, add a tool, details and photo, add the dates the tool is available and confirm, and your tool is listed on ToolMates Hire as available.


Leave a Reply