
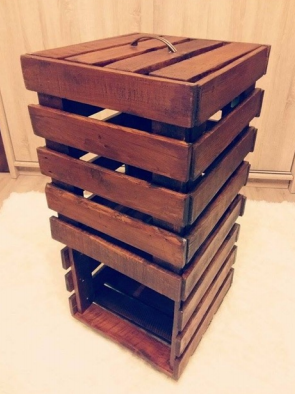
Do you love diy, but not love the look of dirty clothes and linen covering the bathroom floor? Say hello to this swanky pallet bathroom storage vessel!
This lidded wooded container is perfect for your bathroom. Not only does it not take up much space, but it fits in with any wetroom, both modern and the more old fashioned.
Heck, it doesn’t have to even be used for your restroom. This stylish storage unit can be used almost anywhere around the house.
Materials
4x wooden pallets
Caster wheels (optional)
Handle
Nails
Screwdrivers
Screws
Square brackets
Tools
Abrasive paper
Glaze
Hammer
Metre
Paint brush
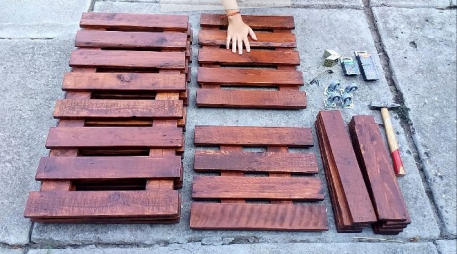
Step 1: Prepare your pallets
The first step is to dismantle the pallets. You can either use a hammer and a chisel, which will help remove the nails, or you can use a saw, which will take less time, but leave the nails in the pallets. You will need 8 pieces of 80cm in the pallet planks, which you will need to cut 40x 40cm pieces and 2x 33 cm pieces. Before working with your pallets, you will also need to polish them.

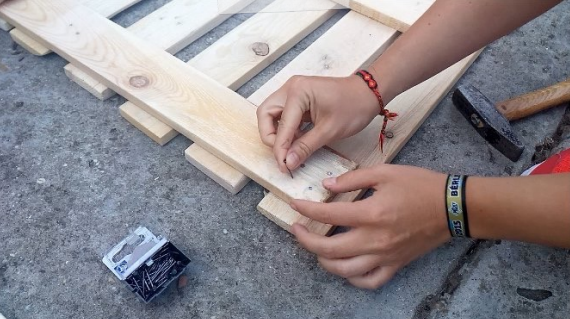
Step 2: Assembling the sides and back
We are going to start by assembling the two sides and the rear of the of the storage. Leave 1.5 cms in space between the top of the sides. Then place eight 40cm slats well spaced out onto an 80cm slat, then fix them on with nails, as shown
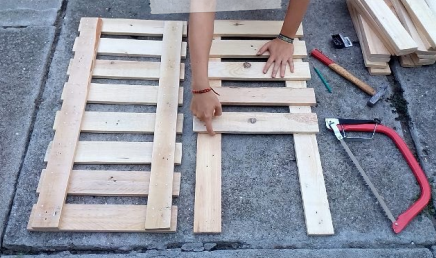
Step 3: Assembling the front and inner side
For the front, you will need 5 slats of 40cms and 2 slats of 80cms. For the inner side, you will need 2 slat of 40cms, and 2 slats of 33cms. Assemble them the same way you did in the previous step, but make sure you cut the two 80cm slats after the last 40cm slat.
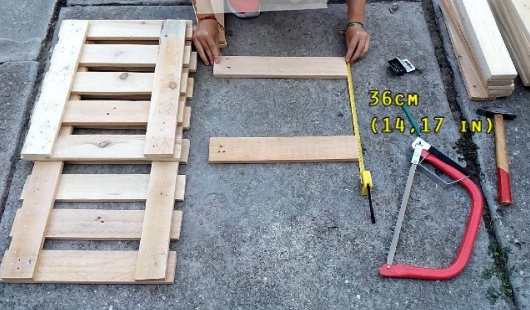
Step 4: The top
For this step, you’ll need 4 slats that you will arrange in a 36cm distance, as shown below. Once you’ve assembled them, add the handle on top.
Step 5: Staining the slats
Now we’re going to coat the surface of the slats with wood stain. Feel free to choose whichever colour you want. We have gone with mahogany.
Step 6: Final assembly
To join the sides, use square brackets – three pieces for each corner and two for the front.
You should have at least 5 pre cut slats for the bottom now. Turning your storage upside down, position the five slats onto the bottom and attach them. Use caster wheels also if you so desire, fixing them with screws.


Leave a Reply