
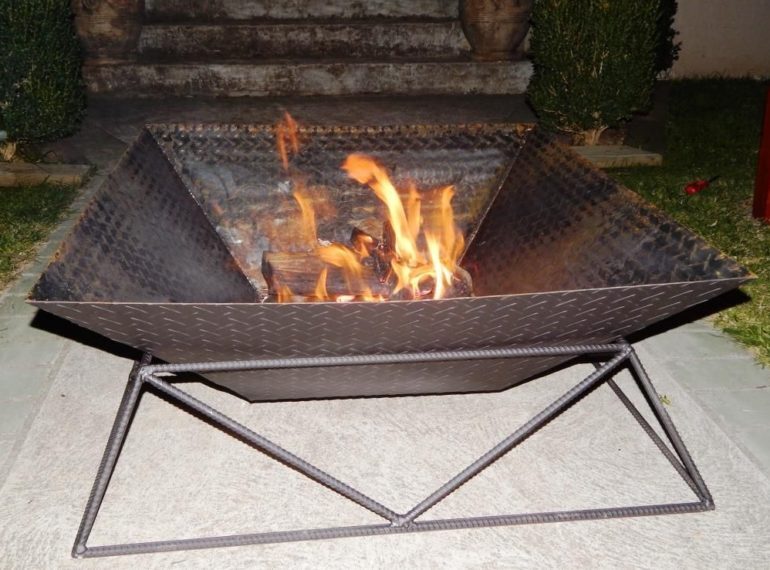
Creating a fire pit is one of the most popular landscaping features in an outdoor space and can add a super cool area for you and your friends to enjoy during summer BBQ’s and social functions.
If you’ve got the space in your backyard that is flat and a safe distance from your house or trees, making a fire pit is a great option for outdoor relaxation, just make sure the local council allow fire pits in your area and you’re not constructing one in an area that has a fire ban.
In this article, we provide some simple steps for creating a steel fire pit for your backyard that is sturdy and made from simple materials. To make the fire pit you’ll just need basic welding and cutting skills or have a mate that is happy to weld on your behalf.
The steps are pretty simple and the project is suitable for people with basic DIY experience, so if you’re keen to do a bit of backyard DIY, this project could be a good place to start.
Materials needed to create and build the barrel smoker include:
- Steel checker plate 1200 x 1200
- Metal for fire pit frame – 11 meters of 12mm steel bar
Tools needed to build the barrel smoker:
- Welder
- Measuring tape
- Hammer
- Angle grinder
The steps for how to create a steel fire pit and frame are outlined below:
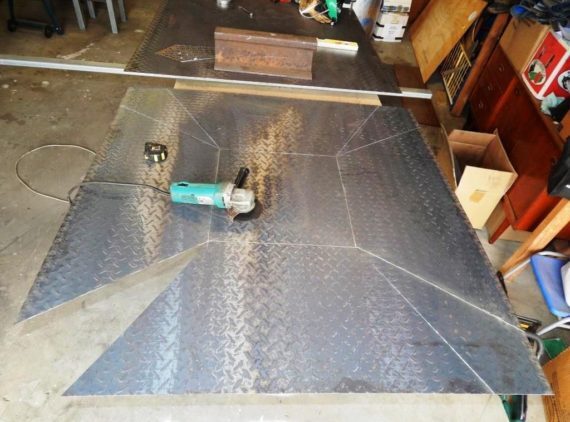
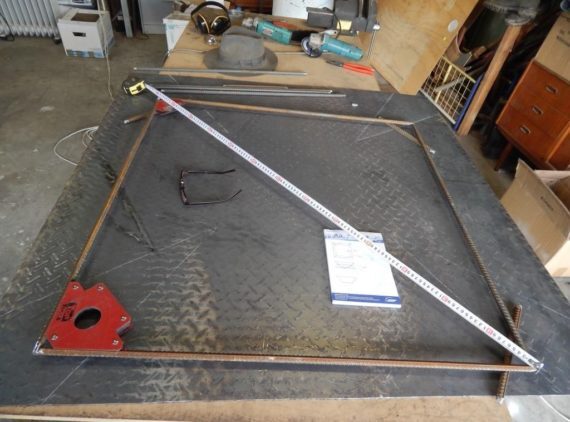
Step 1: Measure up and cut the plate for the steel bowl
In this step, you’re going to need to get out some paper, pen and a ruler to measure out your cuts for the steel pit. The measurements should all be even and you will need to ensure the main frame is square with two cuts per corner. The sides will be 1200mm each so work around the square and map it all out before you start cutting the steel for the bowl.
Once you have mapped it all out, next you will need to get a cutting disc and start cutting your checker board plate out after lightly scoring the lines and folding them on the central square. This should all bend together and the plate should all fit together neatly like a puzzle ready for you to weld.

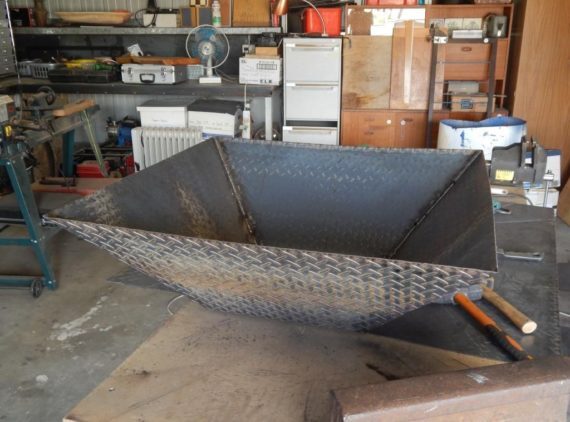
Step 2: Shape the steel bowl
At this point, you’ll have your checker board steel ready to shape into the steel fire pit bowl so you can get ready to weld it all together.
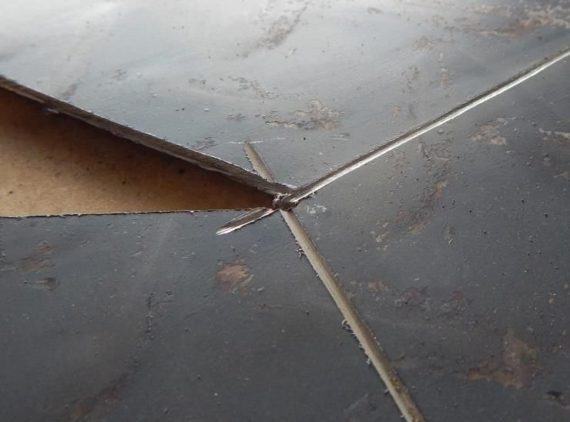
Work around the edges; bend the central square until all of the corners meet together. You might need an extra set of hands, as it is a bit tricky to do this part by yourself.
Once you have all the edges meeting, then you should bring out your welder and lightly weld the corners to hold the shape into place. If you need, grab a hammer and lightly tap the edges to meet.
Weld all of the edges together firmly and if needed you can tidy up any sharp edges with a grinder to ensure it is nice and safe and smooth to touch.
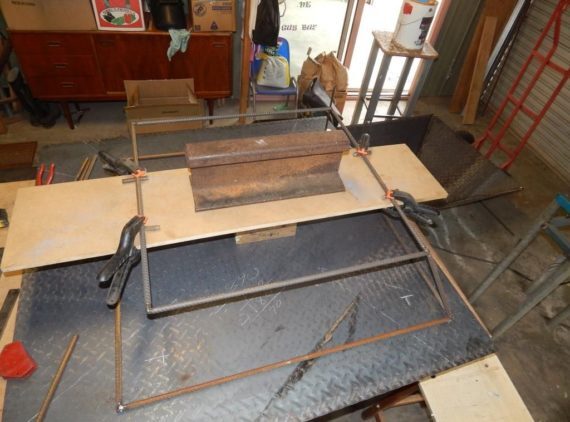
Step 3: Create the stand for the fire pit
Next, you’re going to make the stand for the fire pit to safely sit in.
Grab a piece of paper again and lay this all out properly to ensure all of the measurements work.
The whole idea of the frame is to raise the bowl up from the ground level so it is nice and safe.
For the stand, you will have 900mm x 900mm long sides with a 700mm x 700mm long inner area, and 250mm edges. You will need 4 x 900mm and 4 x 700mm bars cut to start with and then weld it all together.
This part can be a little fiddly, so the first step of drawing it all up to scale is an important one to make sure you get all the measurements right.
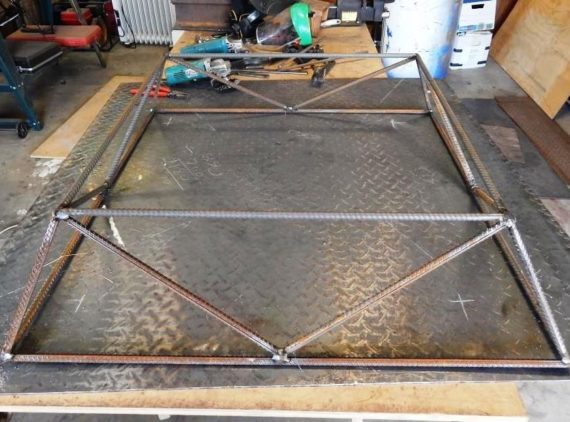
Carefully weld everything together and ensure it is even and square, a wonky frame won’t do the job, so if you do need to make tweaks make sure you get this done at this point rather than thinking about doing it later.
Tidy up any welds with an angle grinder to make sure it is smooth and safe to touch.
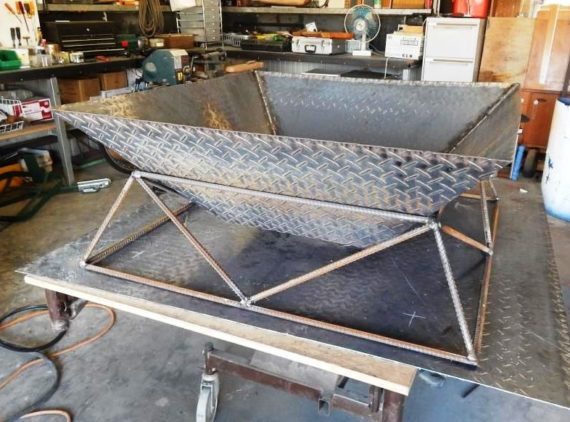
Step 4: Put it all together
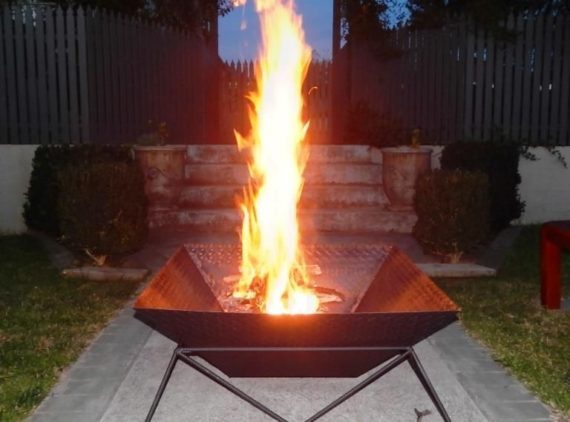
This final step in the process is resting the fire pit bowl into the larger square frame and making sure it hovers above the ground.
Once you have laid the metal bowl into the frame you can get your fire cranking and sit back and enjoy your new fire pit with friends.
Based on how high you want the fire pit to be, you can make the sides of the fire pit shorter by around 100mm so you get a bigger and higher flame. It really depends on whether you have kids at your house and if you want to be super safe or are looking to have a higher flame.
As a bit of an extra consideration, you can add adjustable ventilation if required as well as drilling holes in the bottom of the fire pit to drain rainwater.
Whether you have a small DIY project or a big one, we have the tools you need to get the job done. Listing tools is easy!
Do you own a bunch of tools at home, gathering dust that you hardly ever use? Instead, you should be letting them make you money by renting them out to people in your area. With ToolMates Hire you can now hire your own tools out whenever they’re not in use.
Simply register, add a tool, details and photo, add the dates the tool is available and confirm, and you’re tool is listed on ToolMates Hire as available.
Related Posts
Post a Comment