With the ‘smoker’ craze sweeping the nation, creating the ultimate traditional BBQ is something of an art form – and a competition – whenever friends come over.
So rather than outlaying huge sums of cash for a steep smoker, you can create your own, safe, secure and massive smoker in your back yard.
These units have been designed to be extremely efficient and effective, while also looking great for the backyard. Why only have a smoker big enough to put a few steaks in, when you can create one that can take a whole pig!
Here’s what you need to create your very own smoker that will knock you and your friend’s socks off.
Tools
- Cordless drill
- 1/2 inch concrete drill bit
- Shovel
- Tape measure
- Rubber mallet
- Spirit level
- Staple gun
Materials
- Cinder block: 8x8x16 (Qty. 60)
- Cinder block (1/2): 8x8x8 (Qty. 15)
- Cinder block (Caps): 8x2x16 (Qty. 16)
- Clay brick: 4.5x9x1.75 (Qty. 24)
- 5″ x 38″ (Qty. 2)
- Heat shield insulation (4 ft x 6 ft) and cut to the same dimension as plywood.
- 25″ long, 3/8″ rebar
- 3/4″ X 13 ga. flattened expanded metal sheet to 22″ x 53″
- 29″ x 31″, 3/16″ thick carbon steel plate.
- 2 to 3 5kg bags of sand
Step 1
nWork out your design
The space you have available in your backyard to build a smoker BBQ is not just determined by the amount of space you have, it is always a good idea before commencing this project to ensure that everyone else that is a ‘decision maker’ in your family agrees on the location and size – as once it is built, this bad boy will take some effort to dismantle and move.
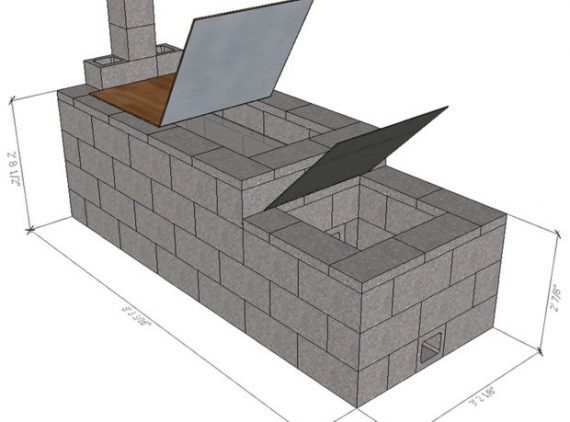
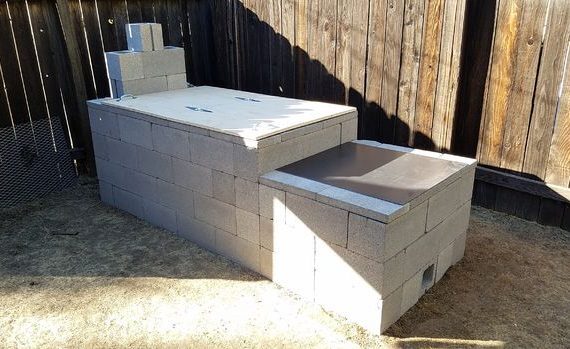
For our design, we created an offset model, allowing the meat to not be exposed to the flames, leaving only the sensational smoked flavour throughout.
Step 2
nCreate your area for your smoker to live
As mentioned, once you have approval for the use of the space in your yard, it is now time to clear the way anything that is currently in the area to ensure you have adequate space and a safe area. Ensure that you have cleared a flat space, ensuring it is flat and unobstructed.
Mark out the space with your shovel or even spray paint, and then add a layer of sand to the area for safety, insulation and security of the blocks.
Step 3
nCreate the foundations for your smoker
Like all good structures, the foundations are vitally important on this smoker. Place a base layer of blocks into the sand, tap into place with a rubber mallet and ensure that they are straight using a spirit level.
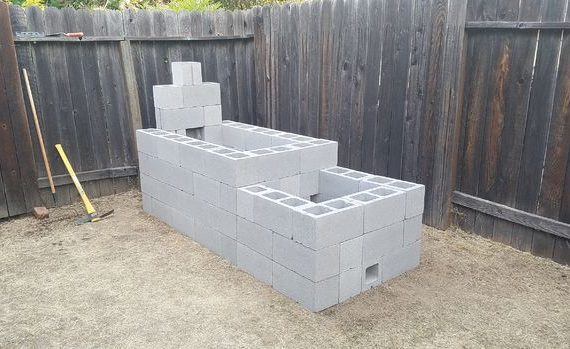
In terms of size for your smoker, we used the equivalent of four whole blocks length ways, 2.5 blocks wide and we ended up taking the initial foundations four layers high – this worked best for our space available as well as the size of the grill plate we wanted to install.
Once the bottom level is in, ensure that you alternate the seam or gap between the bricks so that the strength and integrity of the building is sound. In addition, eliminate the air gaps by placing a closely as possible together. NOTE: you may have a little smoke seeping through the gaps in the bricks; this is ok and unavoidable in most cases.
Step 4
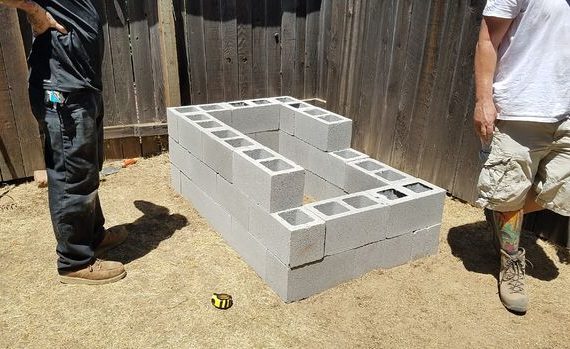
nBuild the firebox for your smoker
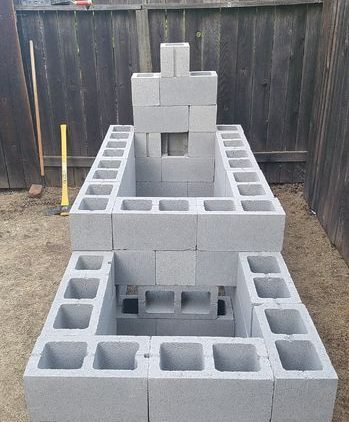
With the smoker in place and looking (and feeling) solid, the firebox can now be built. This will need two blocks long and 2.5 blocks wide (to match the existing smoker). Place your first layer down and ensure that its level.
This is where things become slightly more different. On the second level, adjacent to the smoker box, you need to face your block inwards – see image – so that there is essentially four air gaps for the smoke from the firebox to be transported into the smoker.
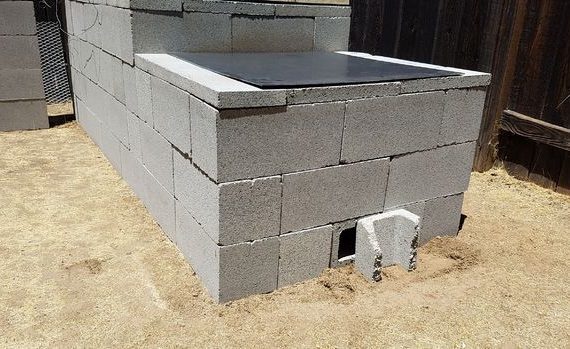
Then, on the front side, you need to create an air hole to allow oxygen to fuel your fire. Again, use a ½ block turned on its side to provide you with the perfect air hole.
Step 5
nCreate your chimney
Likely every good fireplace, you need a chimney for your smoker.
To create this, break another ½ brick into ½ again, so that the chimney has an opening and then stack the chimney three levels high so you have enough air draw and the smoke can bellow our your chimney and let everyone know how good your cooking really is!
Step 6
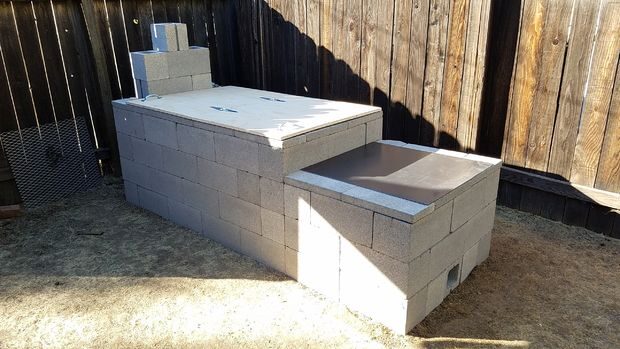
nSeal off with top caps of your smoker
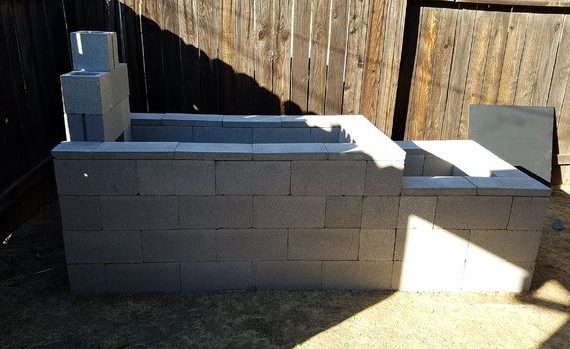
As the blocks have holes, you want to ensure you seal this off with caps. Place the caps on alternating seams, to ensure a better seal and again structural integrity.
Step 7
nCreate your lids
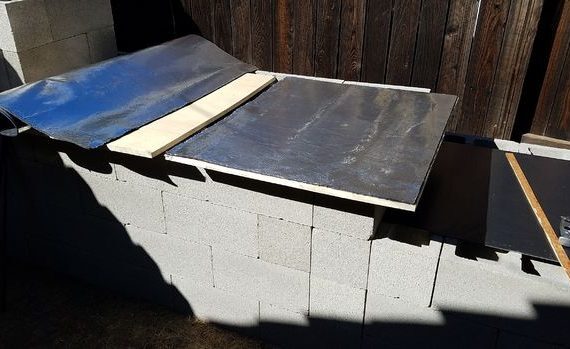
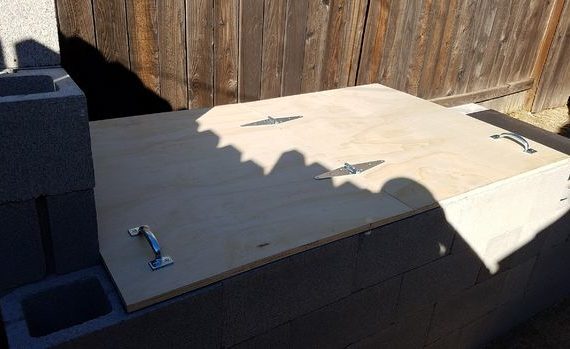
Both your smoker and firebox will need lids, for that cut your plywood to shape.
Once you have your shape, add your heat shield insulation to the wood by using a staple gun to the bottom side.
Put connecting hinges to connect the wood and place access handles on each side so you can add more wood or access your smoker as required.
Step 8
nAdd bricks to fire pit
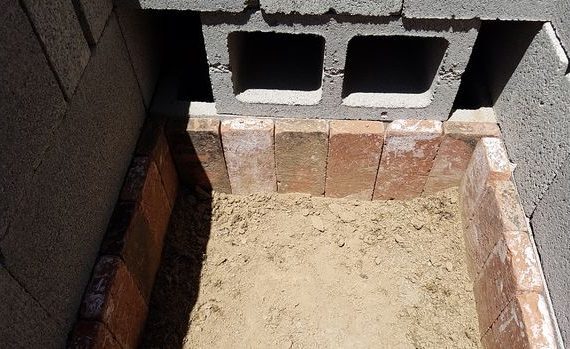
To add another layer of safety and heat protection to your structure, line the inside walls with clay bricks to insulate your fire pit.
Step 8
nCreating great support for your smoker
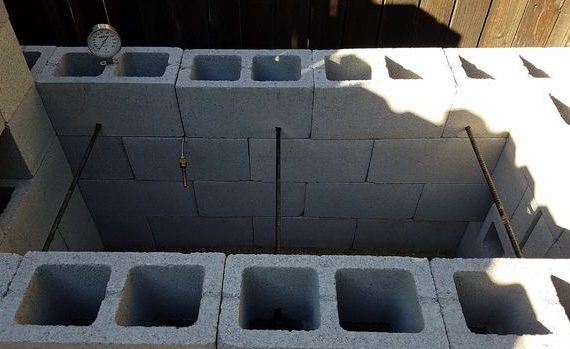
Now we are getting towards the pointy end and you are almost ready to cook – don’t rush through it, we need to get this right.
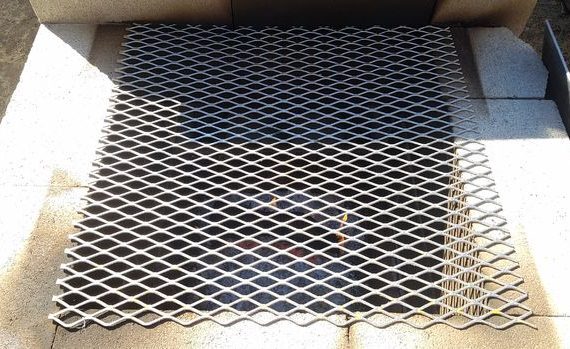
Firstly measure three places in your top layer where you will drill the holes, line them up on both sides, so they are straight & level.
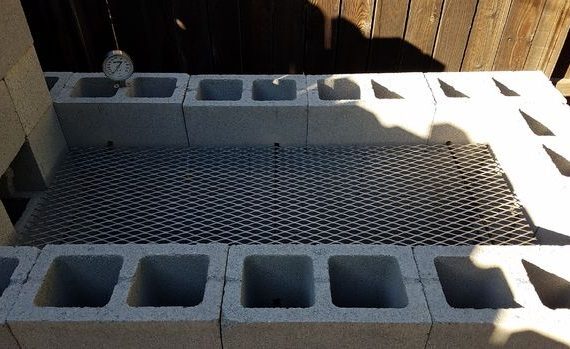
Drill hole in only one side of each block, so you can thread the rebar into the block on each of the three sets of holes you drilled in. Place your flattened expanded metal sheet or grill top you have on top of the rebars.
Step 9
nGet your firebox plate ready
Drill holes into your carton steel plate, enabling you to more easily remove it as required. Drill and attach heat resistant handles to allow you to remove the lid more easily.
NOTE: you must get 3/16 steel plate, as the fire temperature will be too hot for thinner metal!
Step 10 – Now you are ready to go!
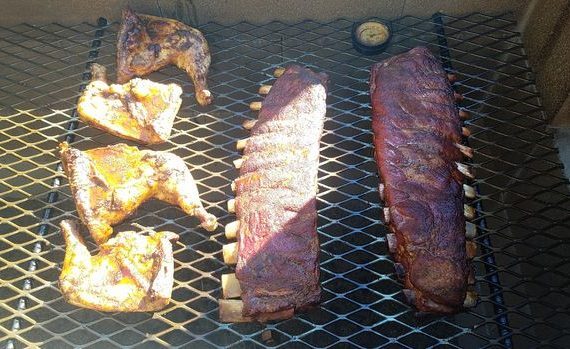
Using a leftover block as a dampener on your fire vent, you can control the temperature you smoke your meat at. Ensure you have your stack vent open at all times and enjoy being the envy of your neighbourhood as you smoke your way to BBQ success!
For more information on how you can create the ultimate outdoor project for your home check out Toolmates.com.au for all the latest info via our blog.
Related Posts
Post a Comment