
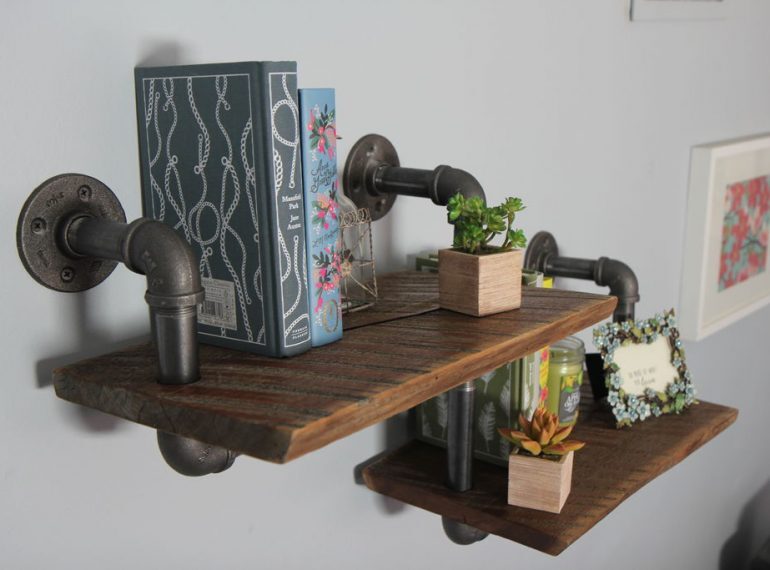
Industrial features even in the most modern homes, shops and offices are very ‘on trend’ in the world of interior design. Not only are they extremely functional and look great, but they are built to last – unlike many of the flat packed, build it yourself and watch it collapse shelves you can purchase from furniture retailers.
So why not have a crack at building your own industrial shelf, using little more than some pipe & some recycle timber – and a little ingenuity. Using recycled timber, especially that which looks like it has been in a car accident, gives all the more character and ‘rustic’ look & feel.
What will you need to build your own industrial style shelf?
Here are the essential bits and pieces you will need to build your very own industrial style shelf from scratch using items from around the home.
Materials for your project
- 2 x 12″ pieces of black pipe
- 2 x 6″ pieces of black pipe
- 2 x 4″ pieces of black pipe
- 3 x 3.5″ pieces of black pipe
- 6 x 90 degree elbows
- 3 x 3/4″ floor flanges
- 1 x 3/4″ black tee junction/connector
- 3 x pieces of reclaimed timber, suitable for the size shelving you want
Tools for your project
- Belt sander
- Cordless drill
- Drop saw or circular saw
- Hack saw – if you need to resize any pipe to fit your needs
- Mounted vice
Why use black pipe?
As you may have noticed around the home renovation shows & stores around the country, black tapware is making inroads.
Black is versatile, goes with just about anything and looks very classy. You could use galvanized pipes and then paint them if you wanted something a little different, but for a modern and cool look black is a great way to keep your interior design looking sharp.
Step 1 – Lay everything out
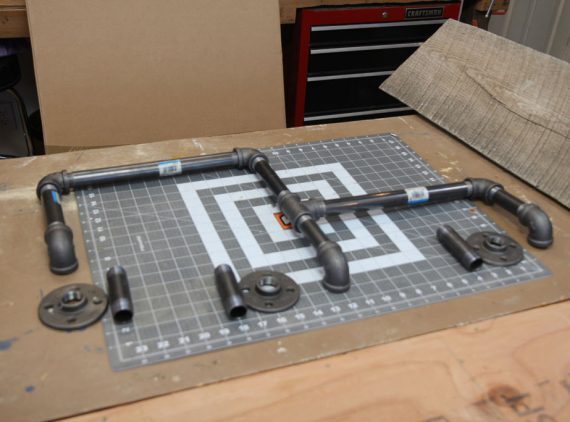
It is always best to lay everything out and see what you are getting yourself into. Ensuring that everything fits and works before you start banging holes in to your wall. As they say, failing to plan is planning to fail!
Laying out the shelf in the way you are looking to have it built on your wall will allow you to get measurements correct, the joins and shelf heights. Ensure that you are measuring the gap between the pipes where the shelves are going to go, ensuring you have the space allowed for overhang.
If you find you need to shorten the pipe for any reason, using your bench mounted vice & hacksaw, measure and cut. Remembering to wear safety goggles at all times as metal shards are not something you want in your eyes at any time.
Step 2 – Prepare your timber shelves
Preparing your timber is next, as you need to cut the wood to length for each of the shelves. You can use a drop saw, circular saw or even a hand saw if that is all you can get your hands on – remembering the cuts from power tools is generally speaking a lot straighter and more consistent.
Remember, if you are using reclaimed timber like me, then make sure you have checked for and removed any old screws or nails, as these could cause a range of safety issues in your cutting.
Step 3 – Lay everything out & get drilling!
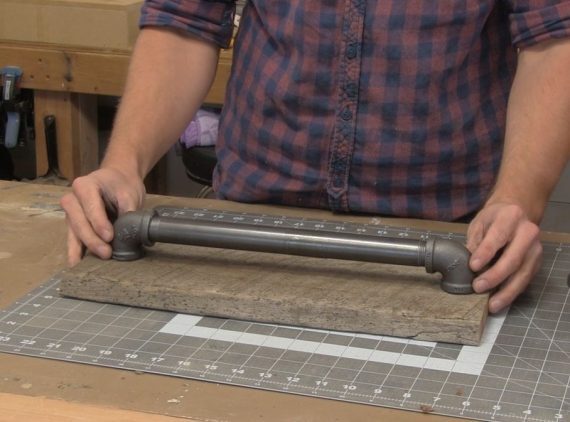
If you are using reclaimed timber, remember not everything will always be square – this is fine, it will actually add character to your shelves anyway. Just make sure you have allowed enough clearance, so your shelf doesn’t hit the wall – as you want the ‘floating’ illusion.
Trace around the pipe and mark up the centre points of those circles. Using a 7/8 bit, drill out each of the holes on the shelves as required. Now you’re almost done creating your shelf, so the next step is to wrap up your project and get it ready to show off to your friends and family how talented you are at DIY!
Step 4 – Finish your shelf
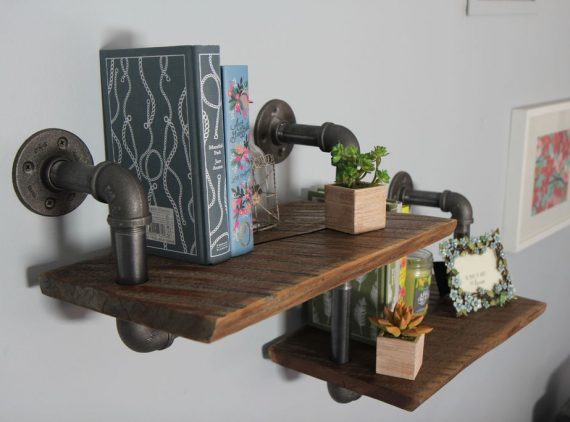
To finish up, firstly sand back your timber and apply several coats of stain to provide protection and a great, professional finish to your new shelf. When you have your treated timber, it is now time to assemble and attacked to your walls. As can be seen, they are a stunning addition to our room, simple, on trend and very functional.
As you can see, making some pretty nifty items out of bits and pieces you have laying around in your back garden or shed is simple with ToolMates. With a little bit of initiative, you can make some very cool items that will not only be the envy or your friends but will be super useful for your next gathering.
We hope you enjoy and remember if you don’t have all the tools you need, why not borrow them from someone in your area using Toolmates, why spend money on buying the tools, when you can lend them for a little fee?
ToolMates is the place to hire or rent out tools from individuals in your local area. Rather than spending up big at the hardware store or tool shop, simply search and find people near you looking to hire the tool you have laying around your shed.
What’s the point in having a bunch of expensive machinery hanging around at home when you only use it once or twice a year? With ToolMates, you can rent those tools out to people in your area and make money off your used items! Find out how with ToolMates.
Related Posts

Post a Comment