For those of us that are dog lovers, there is something that we all typically dread – bath time. Not for ourselves of course, but for our four-legged friends.
If you’re constantly chasing your dog around the place with the hose, trying to hold them down while you attempt to give them a scrub, you may need something with a bit more finesse to wash your canine friend.
Why not create an outdoor doggy shower.
An outdoor dog shower is just the trick for a portable and versatile showering option for dogs of all sizes. You can create a DIY dog shower almost exclusively using PVC.
In this article, we’ll share out tips on creating the ultimate dog shower that will have dogs great and small across your neighbourhood lining up for a shower.
The materials you’ll need to create your outdoor dog shower are as follows:
42.5 W X 33.5 H X 33.5 W
- (8) 3 way elbow http://amzn.to/1WPUT3w
- ¾ Hose swivel adapter
- ¾ 45 elbow
- Hose cut off
- ¾ tee
- 5 x 10 foot PVC
– 8 x cut to 31 inches
– 3 x cut to 40 inches
– 1 x cut to 39.5 inches
– 1 x cut to 36.5 inches
– 1 x cut to 2.25 inches
• Cut to 1.75 inches PVC Cutter
In terms of the tools, all we used was a cordless drill and a tape measure to put everything together – plus a little bit of patience.
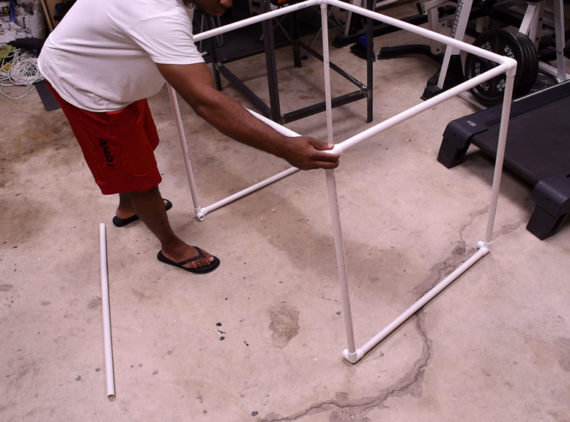
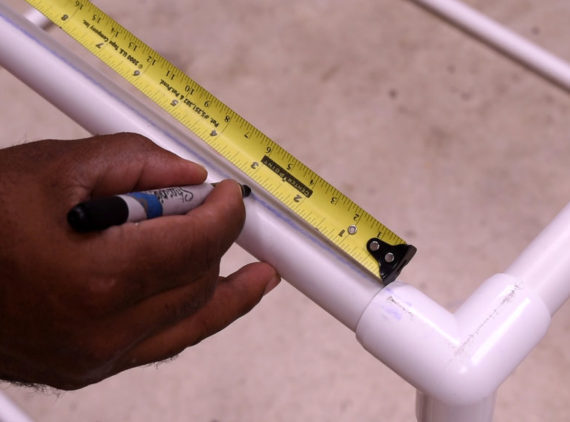
Step 1: Making the frame for your dog shower
Take the following pieces and assemble them to make a frame, as shown in the picture:
– Three-way elbow
– PVC pipes (31 inches)
– PVC pipe cut to 36.5 inches
– PVC pipes cut to 40 inches
Put them all together to make a house structure similar to a cube.
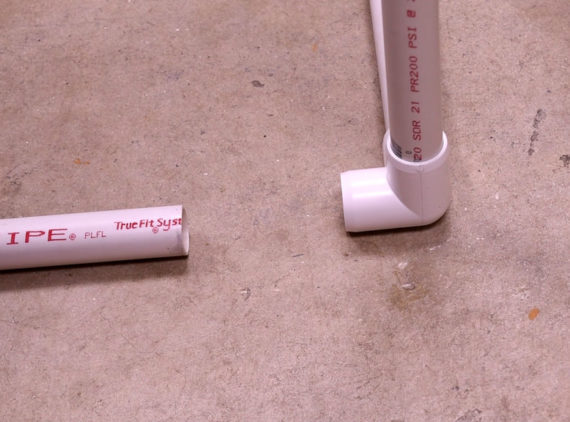
Step 2: Attach the water inlet to your dog shower frame
Next, it’s time to attach the water inlet to your dog shower so that down the track you can put your hose into the socket. In this step, you will need your 2.25in cut PVC to sync up with your 3-way elbow, you will then need to add your ¾ into a tee, add in the 1.75inch cut PVC to face up, install the 45 elbow, add the swivel hose adapter, and then finally add the hose adapter to make your water inlet.
Step 3: Add the middle of the water dispense to the dog shower
In this next step, you will need to add in the middle PVC section that will work to dispense water on your dog. For this part you will need PVC pipe that is cut to a length of 40-inchs, ¾ in tee and then mark and cut it all so that it is centred in the top and middle of your do shower frame.

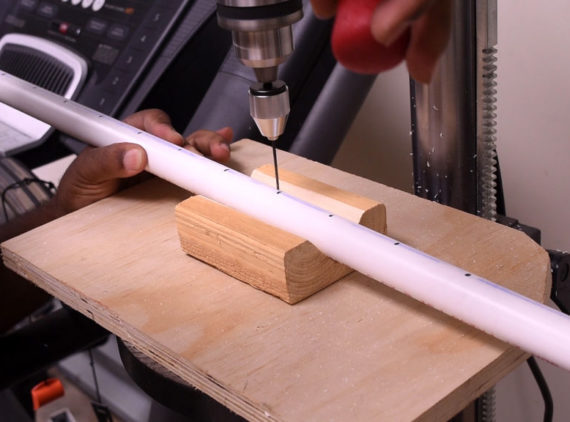
Step 4: Make your dog shower some holes
Make some marks at least 3 inches from the ends and then approximately every two inches for holes for the water to spray out onto your dog.
Then drill the holes with your drill bit but using a drill press and making a quick jig to hold the pipe safely as you drill.
nYou don’t need the holes to be perfectly spaced – it’s more about good engineering and getting enough holes in the pipe so that the water comes through properly and wets your dog adequately.
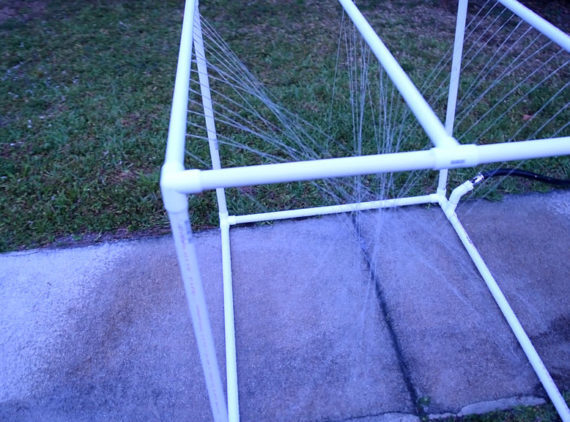
Step 5: Test your dog shower
Now is the time to test out your handiwork. Hook up the hose to your dog shower and turn it on to test if the system works correctly. If there are any leaks, glue or fix them and ensure all joints are tight so that the system works properly.
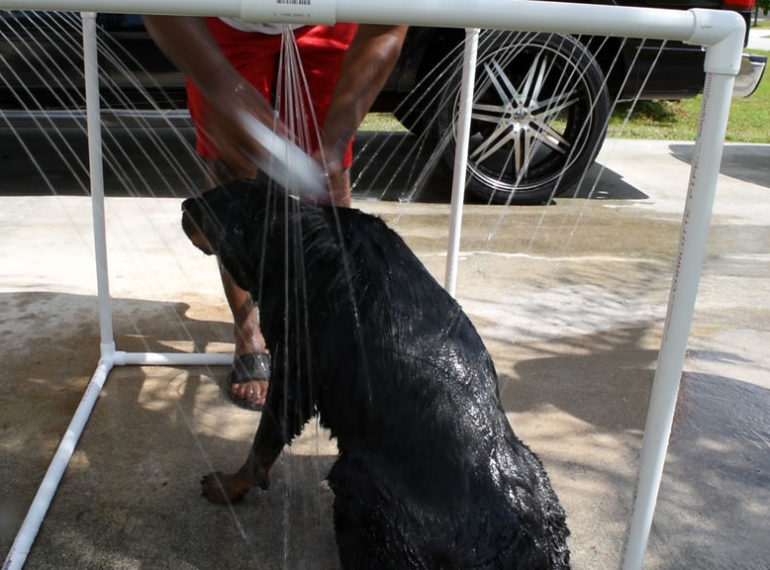
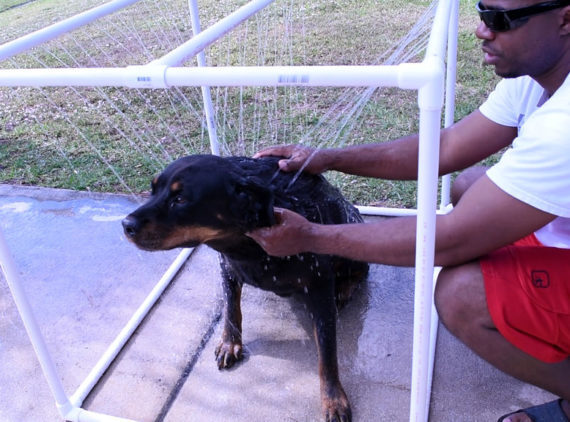
Step 6: Grab your dog and give it a wash
Now it’s time to grab Fido and give him a nice wash.
If you want to pimp out your doggy shower, you can paint it if you like.
Whether you have a small DIY project or a big one, we have the tools you need to get the job done. Listing tools is easy!
Do you own a bunch of tools at home, gathering dust that you hardly ever use? Instead, you should be letting them make you money by renting them out to people in your area. With ToolMates Hire you can now hire your own tools out whenever they’re not in use.
Simply register, add a tool, details and photo, add the dates the tool is available and confirm, and your tool is listed on ToolMates Hire as available.
Related Posts
Post a Comment