
We have all from time to time had a spare rim of a tyre or 4WD kicking around the garage, often to the detriment of your storage space.
This issue we have solved through a little ingenuity and the need for a little extra space over Christmas when it comes to your BBQ grill.
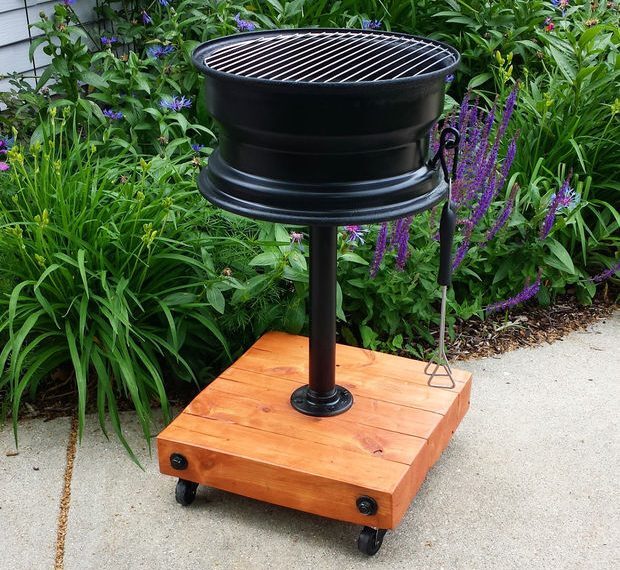
Rather than let your old tyre rims go to wreck and ruin, why not use them to create a grill! Genius you say, yes we would have to agree.
What you will need to create this fantastic outdoor BBQ is as follows:
Tools
- Grinder
- Mitre Saw
- Power Drill
- Planer
Materials
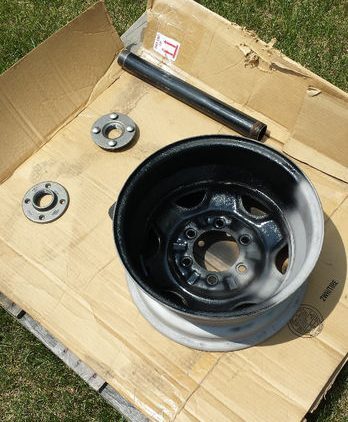
- Tyre rim – the bigger, the better I always say
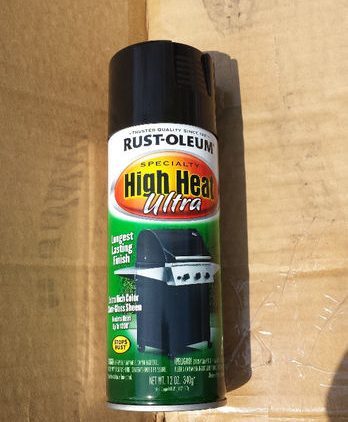
- High heat paint – a couple of tins should do the job
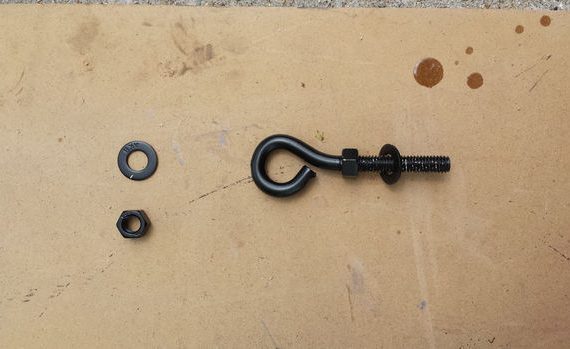
- 4” x 4” x 86”
- 5/8” bolts
- Wheels – so you can easily move this bad boy around the yard
- ½” lag bolts
- 1 1/2 ‘ Steel black pipe
- ½” threaded rods/hardware
- Grill grate of various sizes
Step 1
nPrepare the tyre so you can create the grill

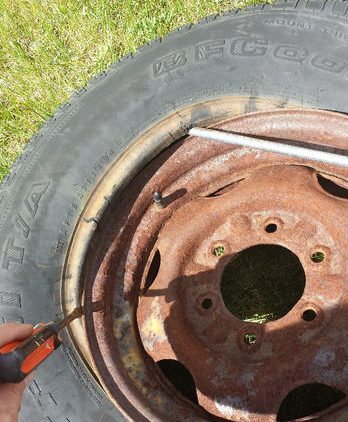
This step almost broke me, so I have a quick tip here…if you are not patient, take it over to your local tyre store and ask them to simply remove the tyre from the rim for you – rather than working on this for hours as you get nowhere, getting your local tyre shop will save you so much time and they will more than likely do it for you for free.
Not realising this option, we ended up using a reciprocating saw with a metal cutting blade to get it started, then using a threaded rod & large screwdriver we eventually got this thing off – my advice…get the experts to do it and save your precious spare time!
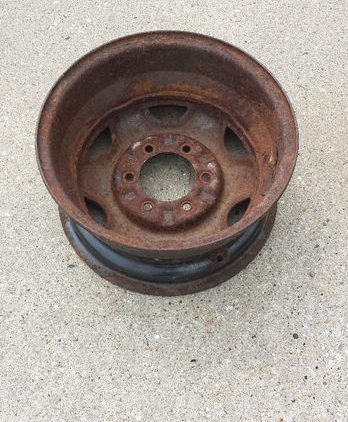
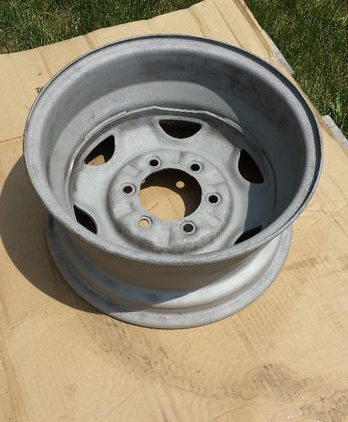
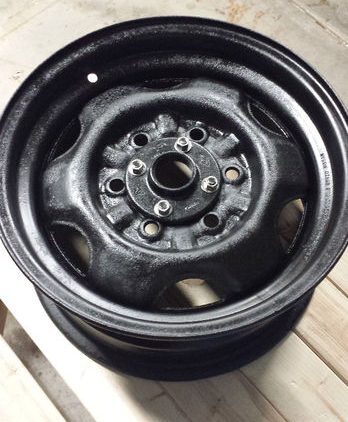
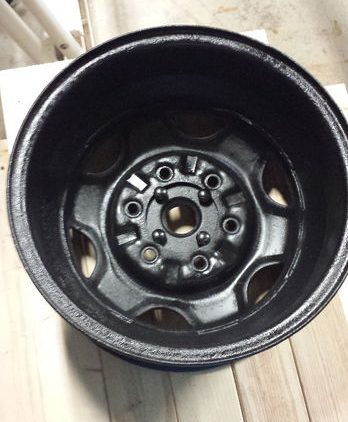
Once you have done this, you need to have the rim sandblasted to remove the rust and grime from the outer layer. Experts can work on the rim and get it looking shiny for about $30 – if you have a quick look, there should be one in your local industrial estate. Have a quick Google, and you should find plenty of locals who can help you with this.
Step 2
nGet prepared to make your awesome grill
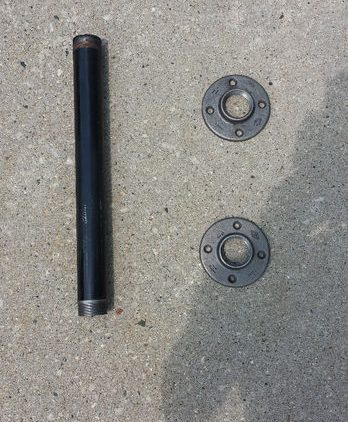

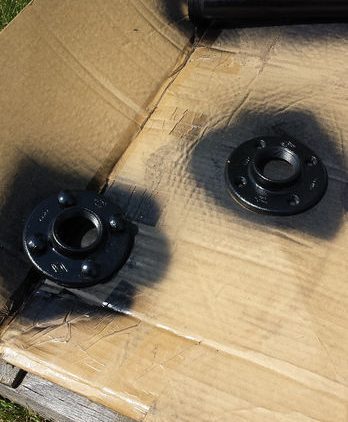
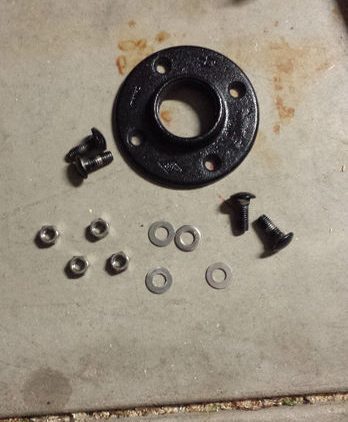
Most of the parts you will be able to find at your local hardware or Bunnings, however you may need a little help threading the ends of the pipe. My local hardware store was able to assist me in getting this done using a threading machine – but you can also do this by purchasing pre-done pipe or borrowing a threader from Toolmates to get the job done right.
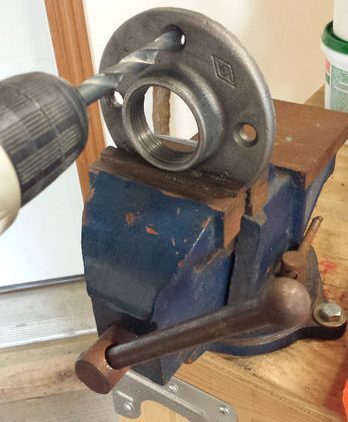
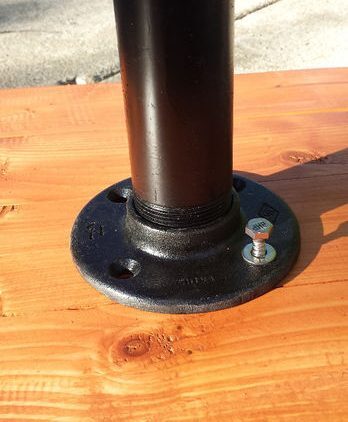
The flange needed a little love, as you will need to widen the holes to accommodate the 5/8” head bolts. But other than that it is all down to painting to get your tyre in tip-top shape.
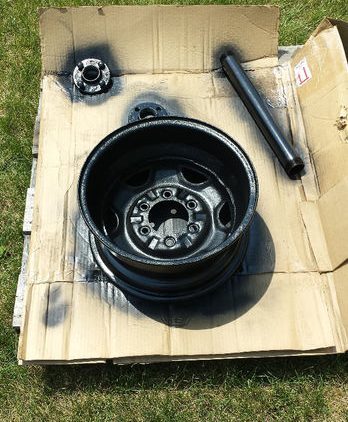
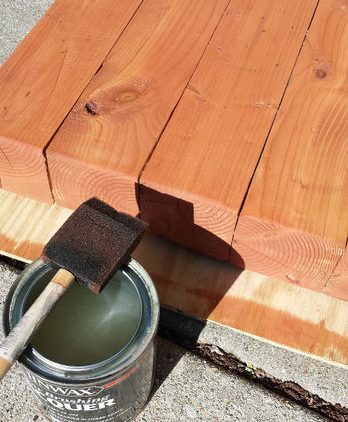
When it comes to the painting, we used high heat paint that is designed especially for BBQ’s or materials that are going to be cooked on – this is important as you don’t want people getting caseinogens from your steaks.
Simply spray your tyre rims, the pipe & bolts applying a couple of coats and using paper towel we wiped around the baring’s to make sure they would seize up with the paint.
Step 3
nCreate your base
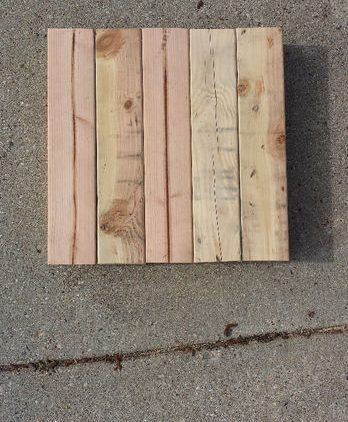
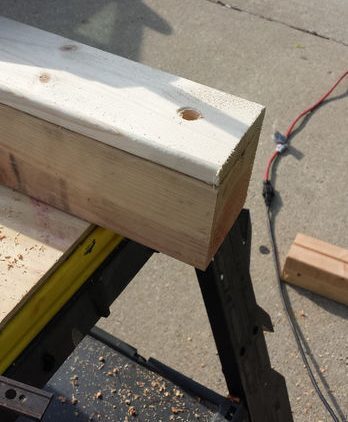
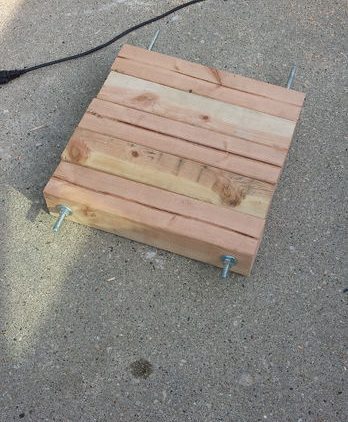
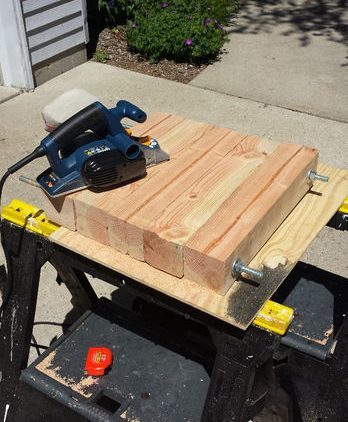

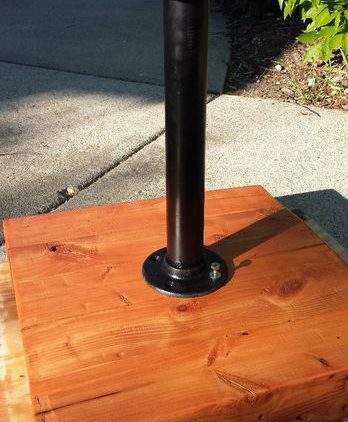
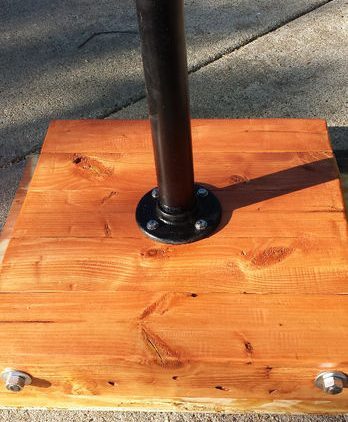
By now you have lugged your tyre rim around enough to know that they are very heavy, so remember to lift from the knees guys, not your back. We used 4” x 4” timber to ensure we had the strengths. Cut the timber to length, we ensured that we created a square structure, using the mitre saw.
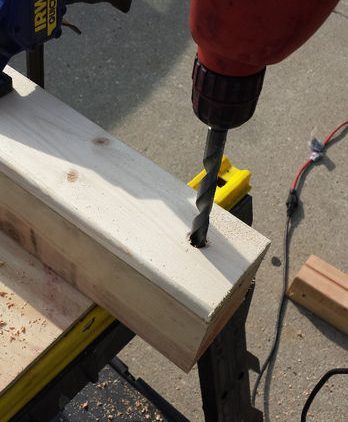
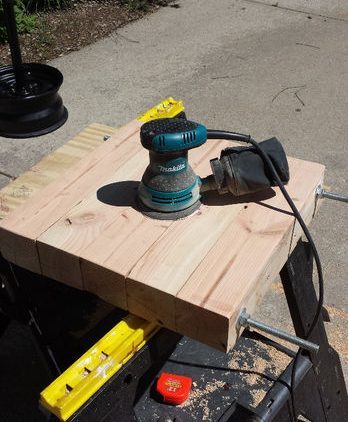
Drill holes through the ends join the pieces of timber with the bolts & washers on the threaded rods & grind them back the protruding rod to give us a nice flush finish. Once you have it in place, plane and sand the wood to give you a surface that you can stain & lacquer.
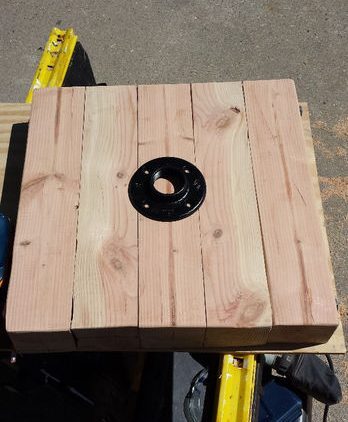
Attach your flange using the bolts to your wooden base, ready for assembly, bolt into place and ensure it is tight as this is your foundation.
Step 4
nGet ready to assemble your grill
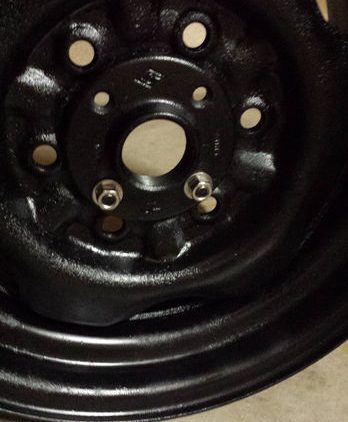
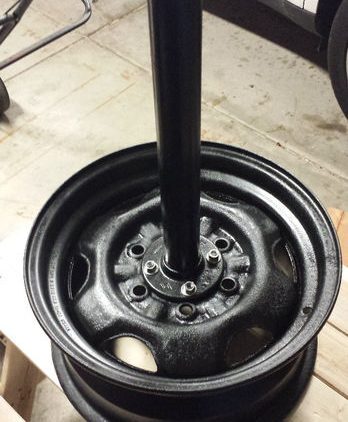
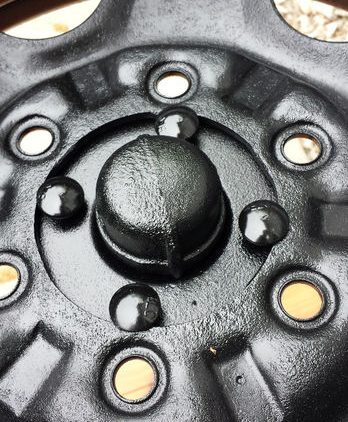
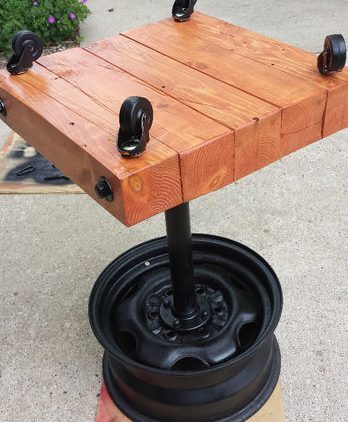
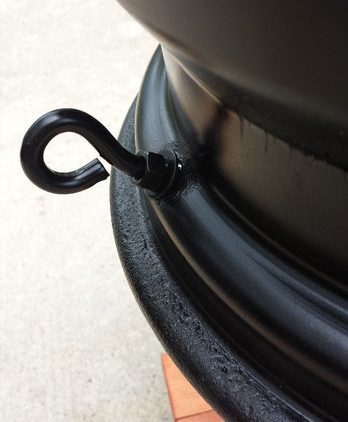
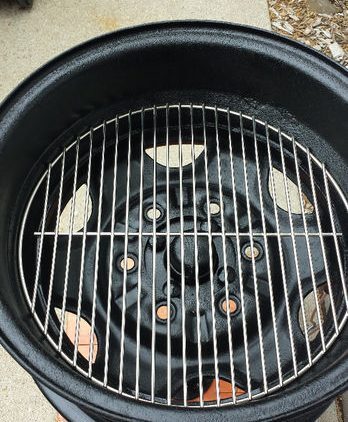
Now, we are getting to the fun part of the project. Attach the flange to the tyre rim using smooth top bolts, ensuring that the lips of the bolt are connecting with as much surface area as possible – you don’t want them falling through, or your grill will come tumbling down – and who wants that when you’re cooking your steaks!
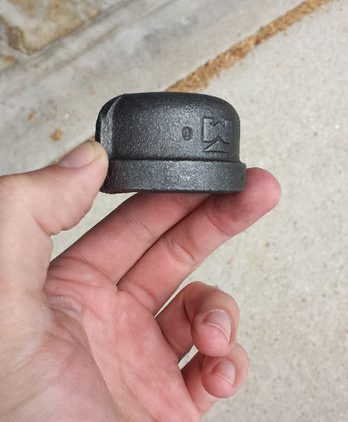
Cover the whole pipe with a 1” cap, so you don’t lose anything down there. Again, paint this with your heat resistant paint and ensure it gets a good coating.
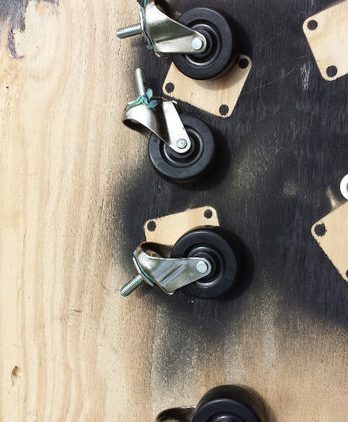
Drill your wheels into the backside of the base to move around the hard as between the rim, timber of the base and the grill gates these things are heavy.
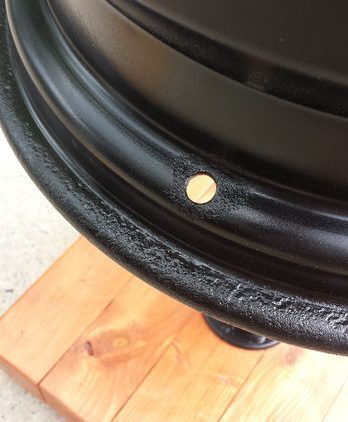
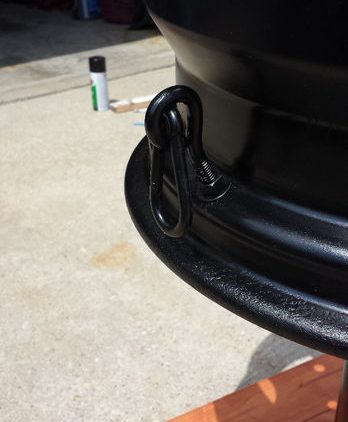
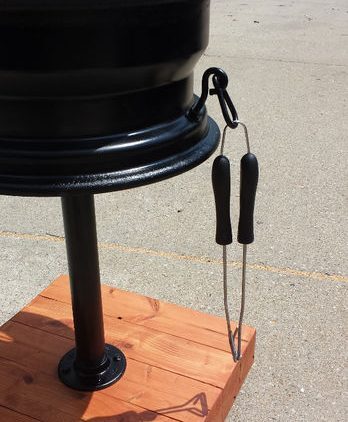
Using the hole there the valve used to come through for the tyre, we connected a carabineer clip with bolts to hang your tongs from which is also super handy.
Step 5
nReady, set, grill
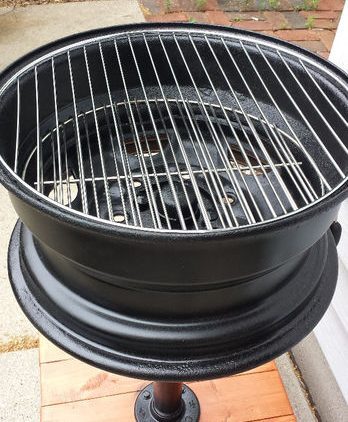
This can be tricky to find, however to solve our problem we went to eBay and found a grate to fit on the low side of the grill which was a little lower quality – but this was fine as it holds the charcoal.
Meanwhile, you need a food grade grill for the top – which we had shipped from interstate, but fit when it arrived it fit perfectly.
This grill can be your primary BBQ, used as a smoker or just as a great add-on for when extra people come around on Boxing Day to watch the cricket. It works well and gives you the charcoal grill taste that can’t be matched by your gas BBQ!
We hope you enjoy and remember if you don’t have all the tools you need, why not borrow them from someone in your area using Toolmates, why spend money on buying the tools, when you can lend them for a little fee?
Related Posts
Post a Comment