If you are tired of having a yard full of your garden tools and you want to create the ultimate garden pallet shed but don’t want to spend big bucks on an expensive shed, you can create a super functional space by simply using old pallets.
With a few simple materials, you to can create the perfect garden shed that won’t cost you the earth and will provide the space you need to store your garden tools, lawn mower or even a little man shed at the end of the garden.
In this article, we step through the process of creating your very own garden shed made from a stack of things you might have laying around in your garage as well as some old shipping pallets.
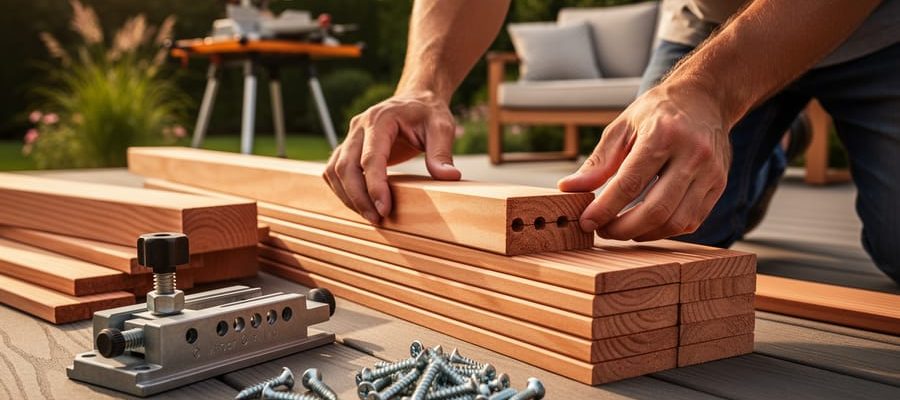
Materials needed to create your pallet garden shed include:
- Old shipping pallets
- Nails, screws and fasteners
- Timber
- Concrete blocks
- String
- Plywood sheets
- Paint
- Hinges, handle and door lock
- Extension cord
Tools needed to build the shed include:
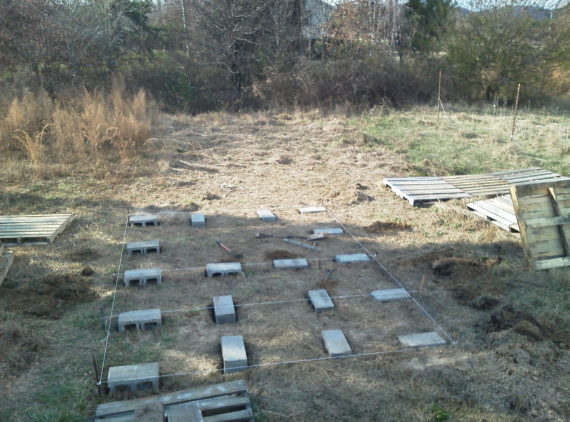
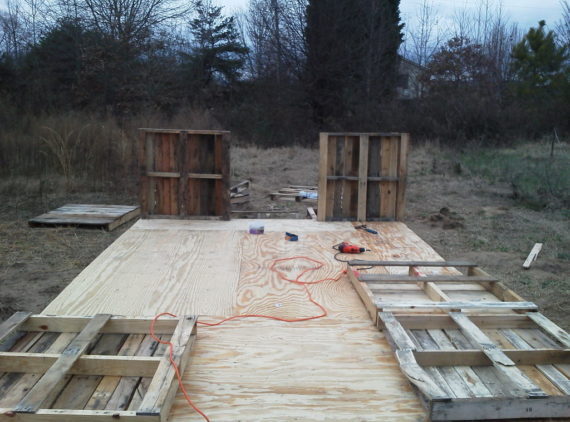
Step 1: Prepare the ground for the floor of the shed
In this first step, you’ll need to prepare the ground to start building the floor on. You will need to try and make sure the ground is level and can use some concrete blocks to build the garden shed on top of to ensure the ground does not rot the bottom of the shed. To get the perfect formation we set all the blocks out in the shape and size that we wanted to build the shed and then tie the string around the outer blocks to make a rectangle around it all.
Once you have done this, then you just need to place a string level on each side of the string and see how far you need to dig into the group to level up the outer blocks so that the tops of all the blocks are sitting at the same height of the string. You can then repeat the process with the middle blocks until you determine which areas need leveling.
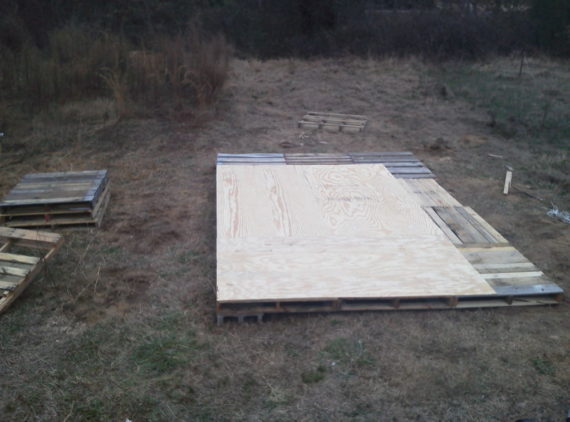
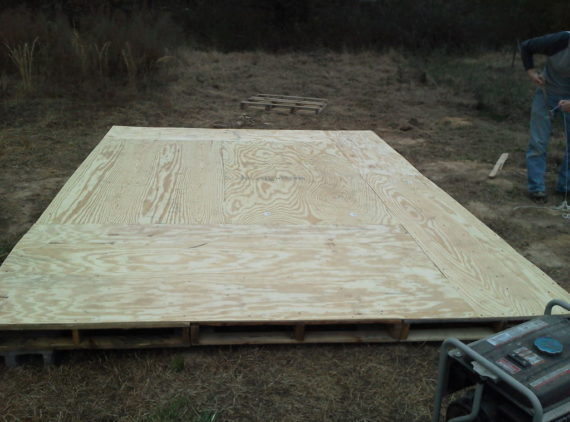
Step 2: Build the floor area
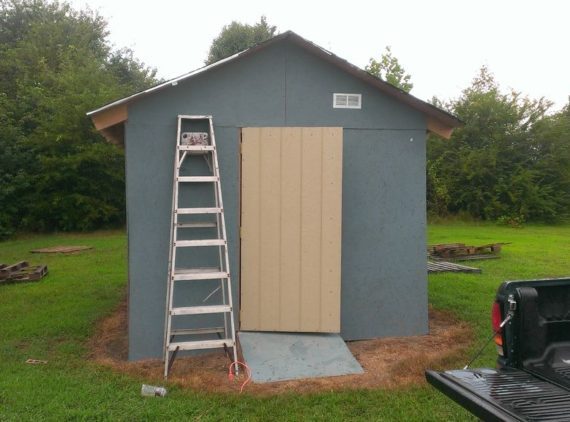
Once you are happy that you have leveled the floor area it is time to put the floor area together. You will first need to figure out how much floor space you will need as this will determine the amount of pallet you need. We created a space that was 10ft by 14ft, which meant we needed 12 pallets of all different sizes laid out to be fastened together.
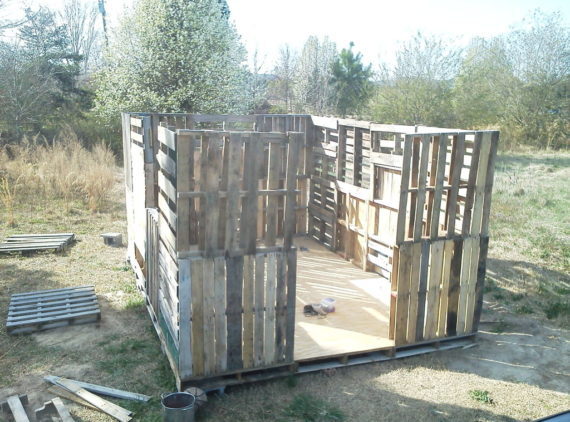
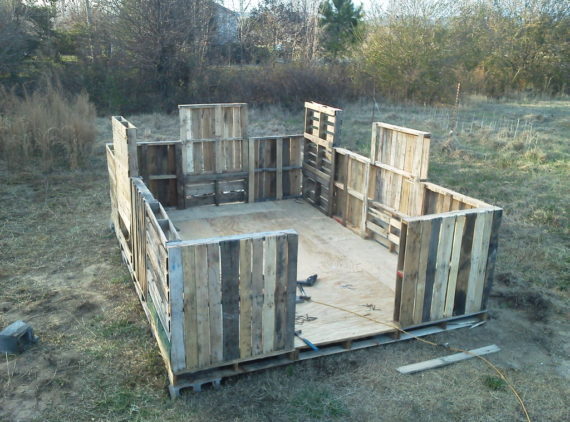
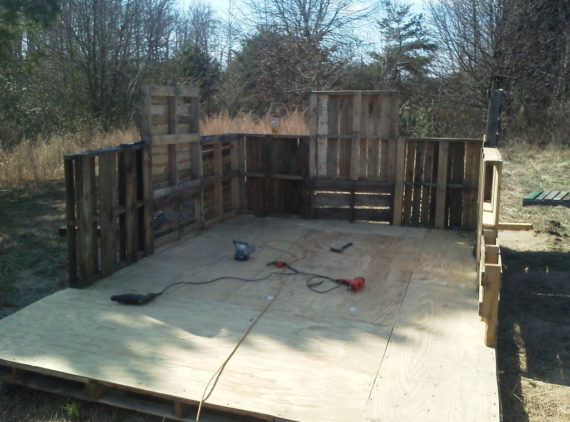
Step 3: Construct the walls
Next, you will need to construct the walls of your garden shed. Setting up the walls can be difficult and you might want to rope in a few friends to help you with the process. To make sure the walls were strong enough, we cut some of the pallets in half so that there was not a single line running through the middle of the building, which created a weak point.
Attach all the wall pallets together using nails and screws while at the same time ensuring that each wall is level and upright. You can use wall supports if you need it, this could help in the construction process.
For our shed, we made the walls two pallets high and then left a gap for the door, which was one pallet wide and two pallets high. You can frame around the top by adding some 2×4’s to help level the walls and keep them sturdy.
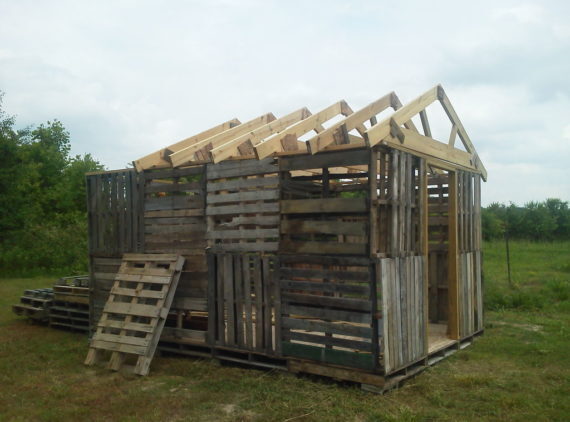

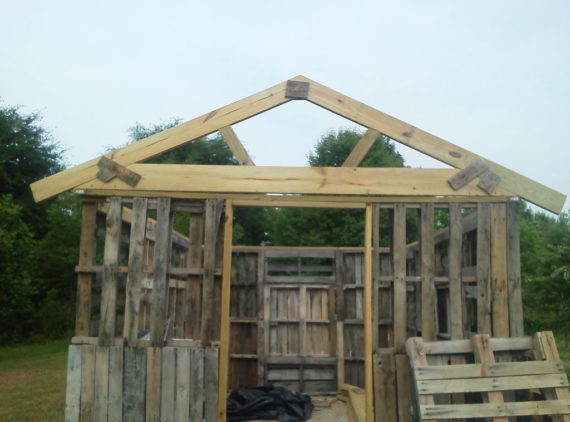
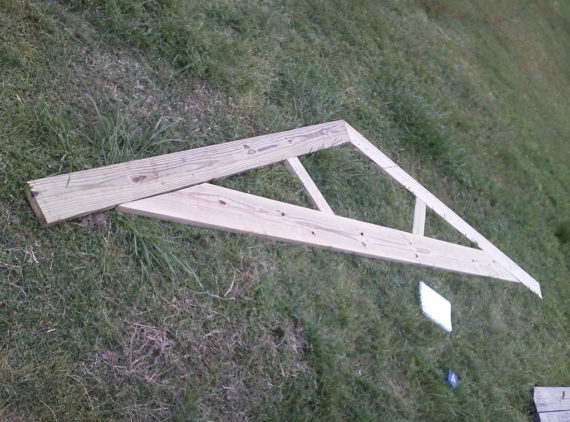
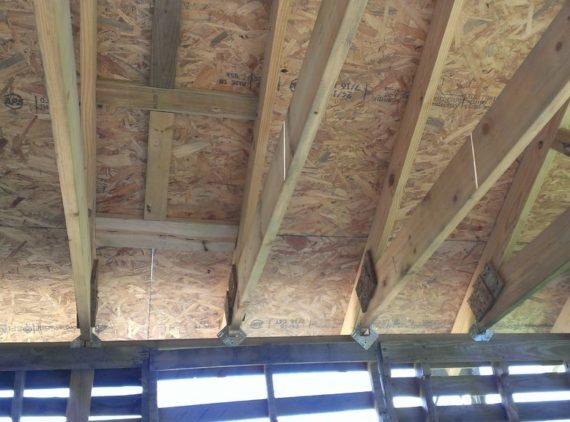
Step 4: Make and install the trusses
Now that you have the floor and walls up, next it is time to create the trusses for the roof. If you have a stack of wood left over from other projects it’s a good way to use up some excess materials you have laying around. We used lots of 2×6’s, 2×8’s and other wood we had around the place. Aim to have a 6-inch overhang for each truss and measure the space to ensure you leave 2’ between each truss.
Put your trusses together and then the next step is to pull them up to roof height and secure the trusses. Space the trusses and then fix them using nails. The more extra hands you can get in this step the better
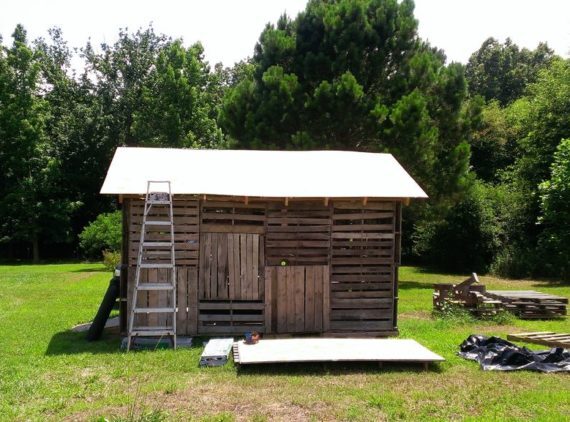
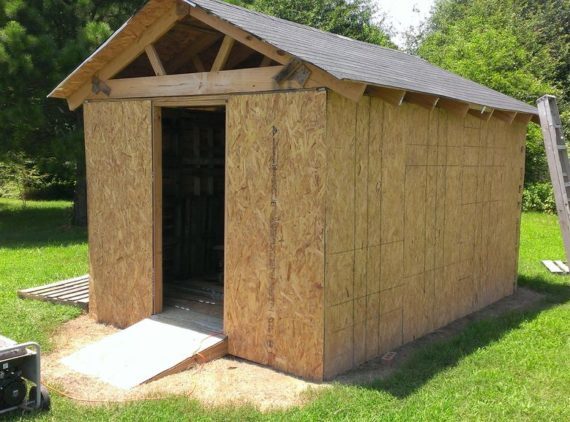
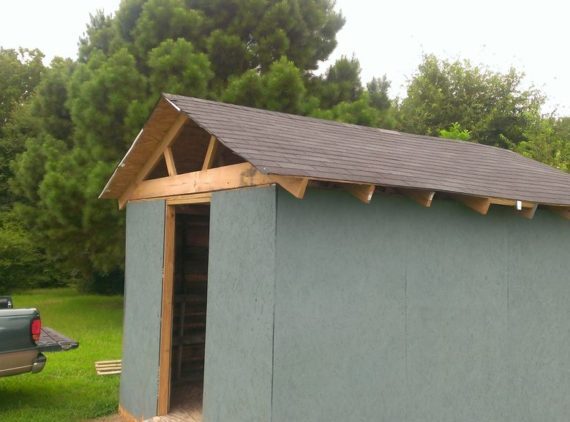
Step 5: Install your roof and siding
Now it is time to put your roof onto your shed. You can use whatever roof material you like, whether it be aluminum roof panels or board, it’s your call. We used board and fixed it to the trusses securely.
Next, you can fix some plywood cladding to the side of the outside walls if you like or use the same material as the roof, whatever you prefer and think will stand the test of time.

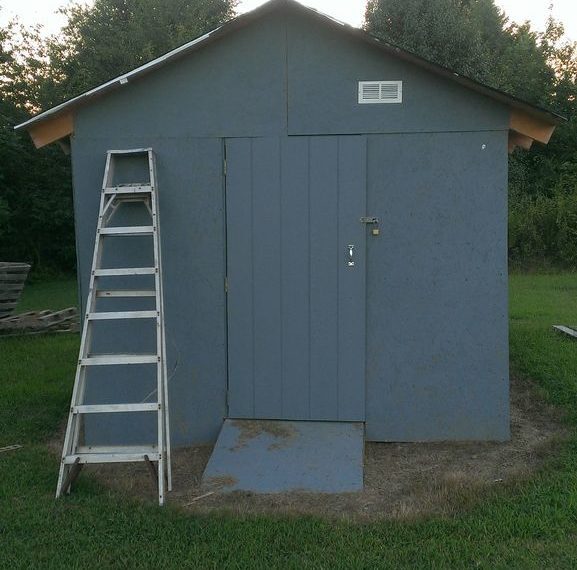
Step 6: Add the finishing touches to the outside of the shed
In the final part of the project, you can add your door, a ramp if needed and put some paint on the walls. The beauty of the ramp is so that you can wheel in your lawn mower with ease or any other heavy garden gear without having to lift it.
Coat your shed in a few coats of paint to protect it from the weather (ideally choose a paint that matches your house or the main property). You can also add a couple of vents to the shed so that there is plenty of circulation.
Once you’ve completed the painting your garden shed is ready to be filled with all your favorite gardening gear.
As a final note, if you have any leftover materials you can build a workbench for the inside of your shed. We used left over pallets and then put some ply on top as the bench. You can add wheels to the legs, or you can make it stationary, whatever suits.
Whether you have a small DIY project or a big one, we have the tools you need to get the job done. Listing tools is easy!
Do you own a bunch of tools at home, gathering dust that you hardly ever use? Instead, you should be letting them make you money by renting them out to people in your area. With ToolMates Hire you can now hire your own tools out whenever they’re not in use.
Simply register, add a tool, details and photo, add the dates the tool is available and confirm, and your tool is listed on ToolMates Hire as available.
Related Posts
Post a Comment