
If you’re heading into the festive season and you’re looking for a few extra seats for guests, or you’re desperately in need of outdoor furniture but lacking the funds to buy it, there is a simple way to great some awesome garden furniture using some pallets and a little know how.
Anyone who has ever done any renovating or building you’ll be well aware that there are always a ton of leftover pallets for any building job, and getting rid of them is a pain – so why not use them to create functional garden furniture.
Pallets are usually used to transport bricks, tiles or other building materials, so are traditionally very sturdy, making them an excellent material for creating outdoor furniture that will not only stand the test of time but be sturdy and practical in the outdoors.
Usually tossed out in council clean ups or left to rot under the house, pallets are hugely useful and a great option for simple outdoor furniture for anyone with a couple of tools and a list bit of time.
If you’re looking to bring out the tools and get a little handy, we’ve put together some steps for creating a simple yet completely functional garden bench for your outdoor area.
Materials needed:
- Pallets – made from good quality timber
- 8ft of 2×4
- Star-headed self-tapping 2.5-inch deck screws
Bench seat tools:
Step 1: Creating bench seat from a pallet
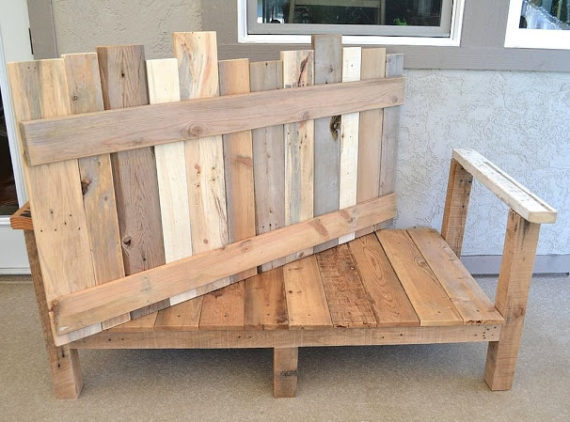
Select the pallet you want to use and lay it out, try and find a pallet that doesn’t have any broken slats, or if it does the broken slats are in a place that you are going to cut. The plan from this point is to create a bench seat complete with four 2×4 legs.
Once your pallet is laid on the ground, figure out how many inches tall you want the seat back to be – pry off any extra slats you don’t need. In our example, we had a slightly wider bottom bench and a back that was three slats wide. In our case, we decided to create a back that was 17 inches high.
Mark off 17 inches sections along every cross member where you would like to make your cuts. Use your trust the circular saw from ToolMates Hire (https://toolmateshire.com.au/tool/power-tools-1434-brand-new-circular-saw) to cut 2-inch deep along the cut marks. Once you’ve done one side, flip the pallet over and repeat on the reverse.
Once this is complete, you’ve got yourself a back for your bench, and the project starts to take shape.
Step 2: Making the arm rests and arm supports for your garden bench
This next step is to grab your 2×4 and cut it into smaller pieces to make arm rests and arm supports for your bench seat. Each of your 2×4 should be cut into four individual sections with each measuring 21.75 inches in length.
Step 3: Here’s where you attach the arm rests to the garden bench.
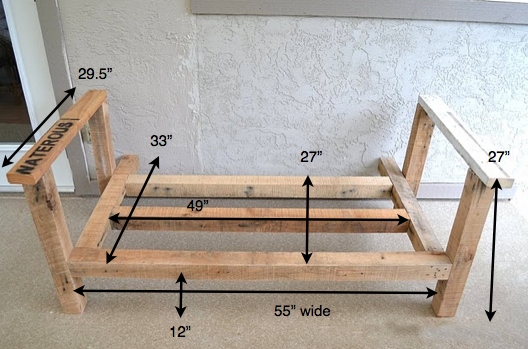
Raise your garden bench using some cut offs or blocks so that the back of the seat is 8 inches off the floor and your front section of the new garden bench is 10.5 inches off the ground – the height can be anything you like, just adjust to your taste.
Next, fasten the legs onto the garden bench with your cordless drill – if you don’t have one you can hire it from ToolMates Hire.
Drill in the deck screws throughout the 21.75-inch boards each being drilled through the sides and into the bottom back of your garden bench.
Now your legs are positioning onto the back of the seat you’re cooking with gas. This step you’ve essentially attached the legs to your new garden bench and you’ve also fastened the other sections of the garden bench together too, making it completely sturdy. Look at fastening four screws to the top section and four screws to the bottom section – whatever it takes to ensure you have the support you need for your garden bench.
Now double check your front legs are a good height to fit the garden bench and are all square and meet the ground properly and then add in a few screws to the front legs and fasten them to each side of the garden bench.
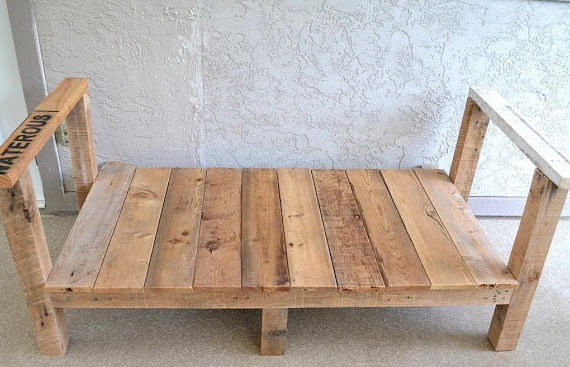
Now you should notice your bench seat taking shape.
For extra sturdiness, you can toe-nail a screw into each of the two supporting beams on the garden seat and the back seat, joining the two sections together and protecting against any future bowing.
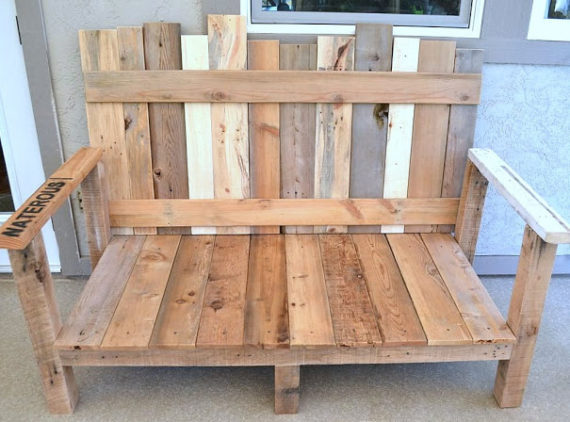
Step 4: Making arm rests for your garden bench seat
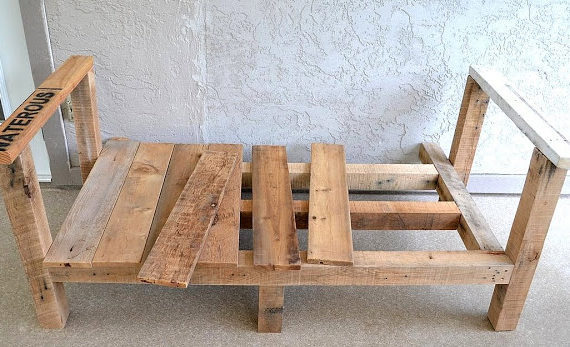
If you have any leftover slats from the bench seat, you can use these as arm rests or just grab them from another pallet you might have laying around.
Simply span the slat over the two bench legs where the armrest should be and cut off at the back. With the leftover piece that is hanging over the seat back it’s easy to add a couple of screws and put them through the arm and right through two legs fastening it all securely to the bench.
Repeat on the two sides and your pallet garden bench is complete.
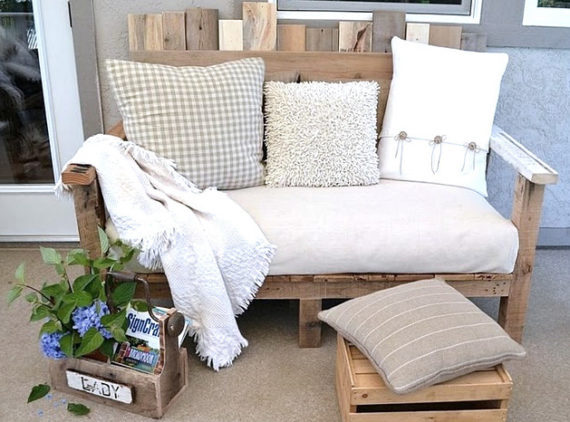
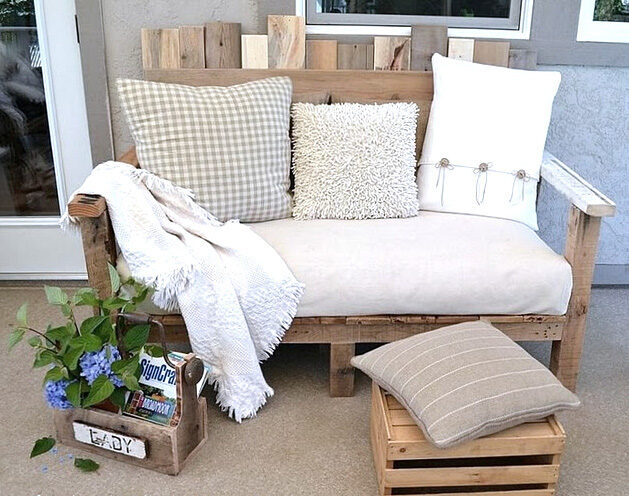
If you are super handy, you can measure and create a bench seat cushion fairly easily or have a look out at your local hardware or DIY shop for long bench cushions to suit.
Making a pallet garden bench is simple and fairly straightforward and should take you no more than two hours, so if you have any leftover pallets, or you’re looking for a cheap and reliable option for outdoor garden furniture be sure to get your tools out and have a crack at making your garden bench quickly and easily.
Outdoor patio furniture is easy to create and you can paint or sand the furniture and stain it to make it blend in with your space or garden area. Cushions and a little bit of padding help to make pallet furniture a fantastic option for thrifty and handy DIY lovers who would rather create their own bespoke furniture than spend thousands on outdoor furniture.
ToolMates Hire is your one-stop online platform for the sharing of tools all via the comfort of your home. If you’re looking to do a DIY project and don’t have the right tools or you have tons of tools and no time to use them we can put you in contact with people looking to hire in your local area so you can make money from the tools you have gathering dust at home.
Simply register, add a tool, details and photo, add the dates the tool is available and confirm and you’re tool is listed on ToolMates Hire as available.
Related Posts
Post a Comment