
With the trends of ‘shabby chic’ dominating the design halls around the world, you can be forgiven for thinking that a specially made pallet outdoor lounge is something from an art deco warehouse that’s going to cost you the earth to buy.
The good news is, you can make a low budget pallet outdoor lounge using a few old pallets you, some screws and a little bit of know how.
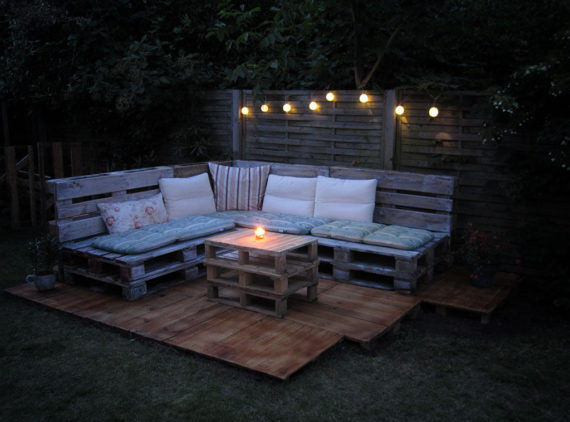
If you’re looking for a low budget, functional and up cycled outdoor lounge, this pallet lounge is the perfect thing for long days lazing in the sun and delightful afternoons relaxing with a cool drink.
In this article, we share our top tips on how to create a low budget pallet outdoor lounge using some old pallets and a little bit of elbow grease.
Material list for pallet outdoor lounge:
-
- 10 standard pallets
- 15 other with no gap between the bars in different sizes
- Wood stain to protect the pallets
- Screws and brackets
Our tool list:
- Cordless screwdriver
- Pad sander
- Brush or spray gun
- Spirit level
- Saw
Step 1 – Create your space
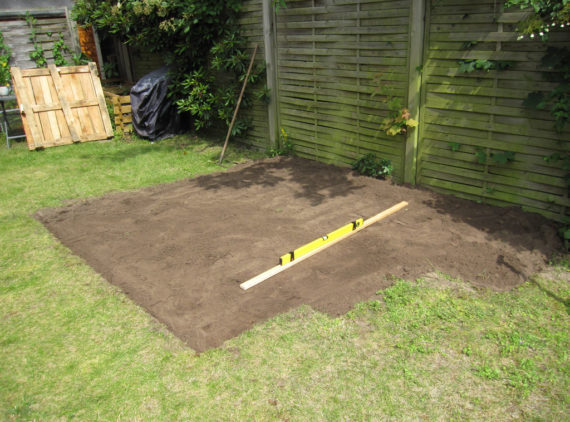
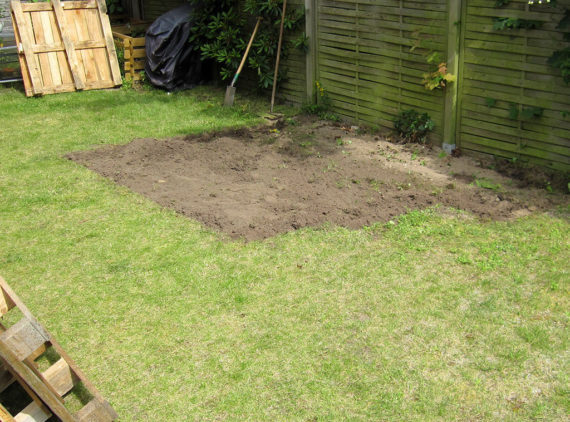
Work out the space in your yard where you can lay out the 15 pallets in a square configuration – it will be a raised platform so keep this in mind when you are looking for your space.
Lay out the pallets into the configuration you are happy with, and then mark around the perimeter. Remove all the grass from the area and rake the surface flat – you don’t want any grass over time coming through the terrace floor.
Clear any trees, grass or plants and you’re ready to get cracking on building your terrace floor.
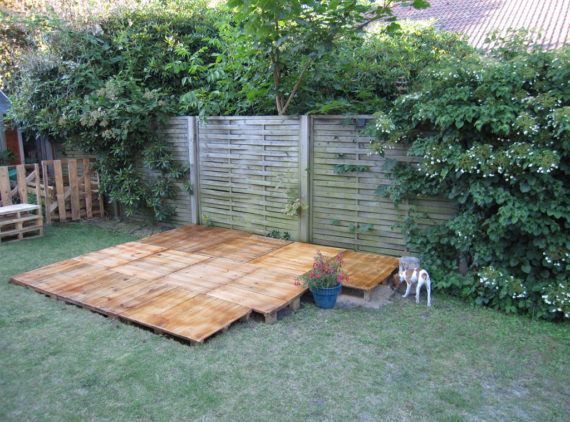
Step 2 – Build your terrace floor
With your space cleared, rearrange all the pallets into place. As you go along screw each pallet in place using brackets to ensure they are flat and straight.
Once you have created your space, sand the space to ensure it can be walked on with no shoes and there are no protruding nails or screws from the pallet’s former life on the road. Take the time to sand back properly so your outdoor couch is perfectly smooth and comfortable.
Finally, cover the wood in a wood glaze or seal with an outdoor paint to ensure the wood is protected and will last the test of time.
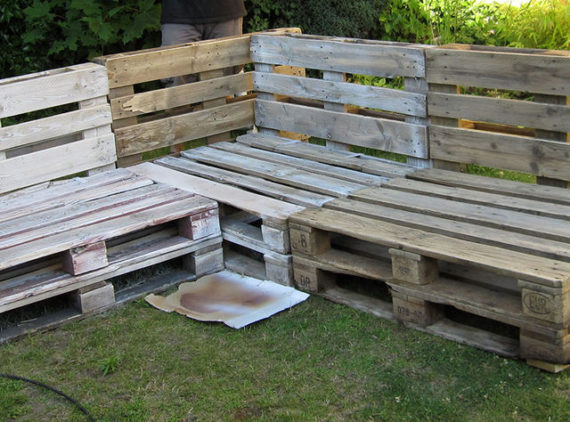
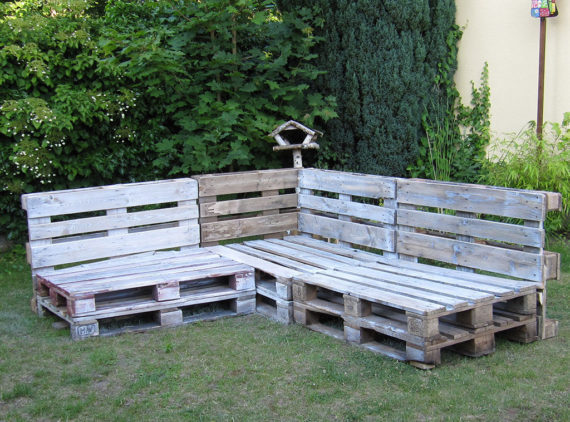
Step 3 – Start building your couch
Three pallets make up one section of your couch, with two pallets stacked on top of each other you can make up the base and one pallet on its side to make up the backrest.
The idea is to create an L-seater couch, comprising of three sections created as be the above makeup. There are two units that are identical for the sides, while the centre or corner unit will have a few more elements required.
In creating the corner unit, this is where things could become a little unstuck. Depending on the size of your pallets, you should be able to place an additional pallet up against the corner unit to provide the second required back rest for the corner unit. If you pallets are the same, there should be no issues in arranging this so there is no gap.
Screw the pallets together using brackets to create each section, the screw the sections together – once they are in place on your terrace floor.
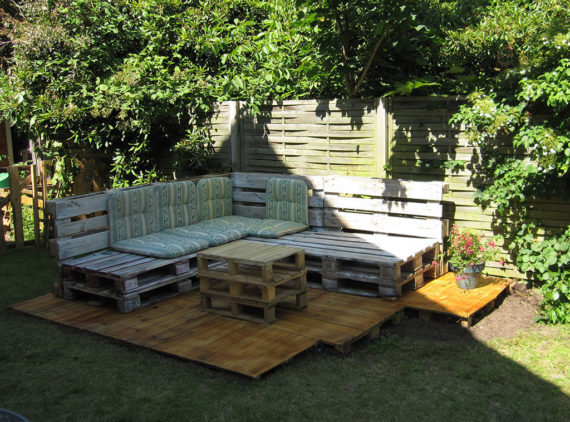
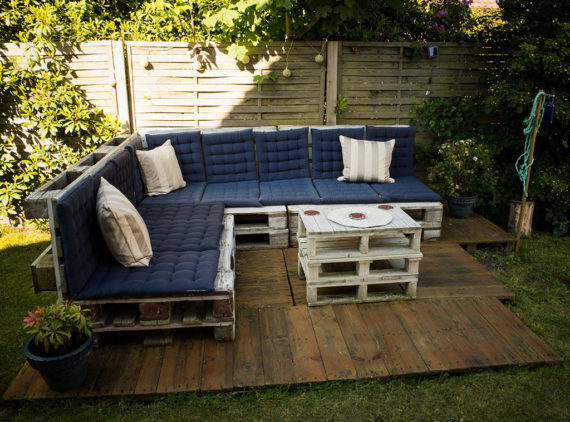
Step 4 – Finishing the couch
Depending on your personal preference, you should finish the couch in a stain or glaze which will not only be visually appealing, but will add protection to your new outdoor living space. In choosing a colour such as white glaze, you will add a shabby chic look, which with a few scatter cushions is extremely effective. The style is totally your call, and you might want to create a look that ties into the outdoor area of your home.
Don’t forget to purchase some durable outdoor cushions for the base and back, they don’t necessarily need to match, they just need to provide a soft landing for the backsides of you and your guests.
Step 5 – Something a little extra
If you have a few left over pallets that maybe a little smaller, you could stack these up, attach with screws and brackets and create a table. Ideally you will use the pallets with no gap between the slats or your table may have limited uses. If the table is too big, then consider cutting the size down slightly to be more useable in the space you have available. At the end of the day you can create as many additional pieces as you have the pallets for including side tables foot rests, your call.
Step 6 – Looking after your outdoor setting
Now that you have created the envy of all your friends and family in terms of an attractive outdoor setting that offers you an space to sit and enjoy the afternoons, nights or mornings with your loved ones – you should take care of it.
Make sure you treat your outdoor lounge setting with a regular coat of glaze, paint or stain to protect it, so that is lasts throughout the seasons and continues to look good. As needed you can sand it back and repaint it, giving it a whole new lease on life.
So there you have it, with some second hand materials, a small back yard space and some ingenuity you can create an outdoor area that is multipurpose, durable and doesn’t cost the earth.
Whether you have a small DIY project or a big one, we have the tools you need to get the job done. Listing tools is easy!
Do you own a bunch of tools at home, gathering dust that you hardly ever use? Instead, you should be letting them make you money by renting them out to people in your area. With ToolMates Hire you can now hire your own tools out whenever they’re not in use.
Simply register, add a tool, details and photo, add the dates the tool is available and confirm, and your tool is listed on ToolMates Hire as available.
Related Posts

Post a Comment