
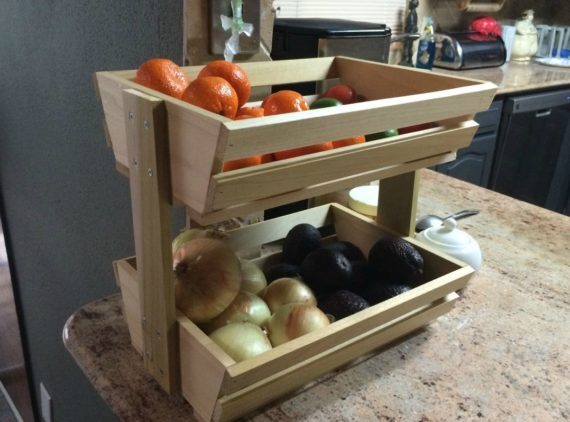
Fruit and vegetable department in your fridge getting a little full? Or maybe you just want to encourage your household to eat fresh! Why not build yourself a quick and easy diy fruit and vegetable/produce rack!
This is as quick and easy as diy projects come! Set yourself aside an hour or two and build yourself this neat little storage rack for your produce, or anything else you want to store in it!
Materials
2x 1x6x10′ wooden boards
Tools
Brad nailer
Glue
Table saw
Step 1: Cutting the boards to size and shape
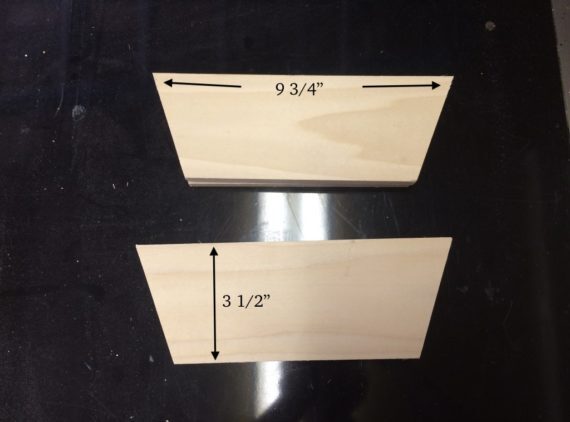
Of course, you can purchase whichever kind of wood boards you want, but keep in mind qualities such as smoothness – if you don’t want to spend time sanding, or get splinters in your food, choose a smoother wood. For this example, we used poplar. The width and length is also up to you, but for this project, we have cut ours to 3 1/2″ wide and 9 3/4″ long, angling off the ends to 20 degrees as shown, using a mitre saw. For this example, we are making two baskets, but feel free to only make one.
Step 2: Making the slats
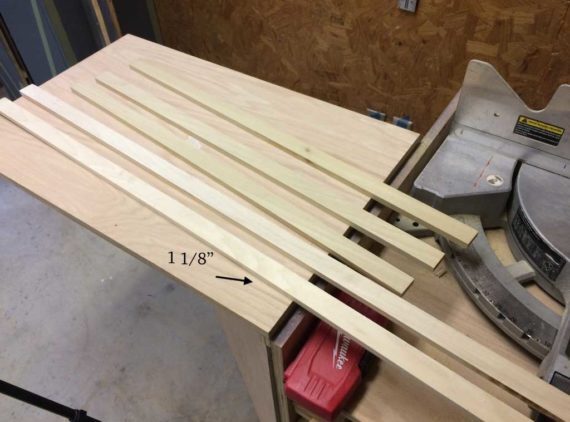
Next, we cut a few thin strips to make the slats. As you can see, our slats are 1 1/8″ wide, and once we had them cut, we trimmed them to a length of 14 1/4″.
Step 3: Attaching everything
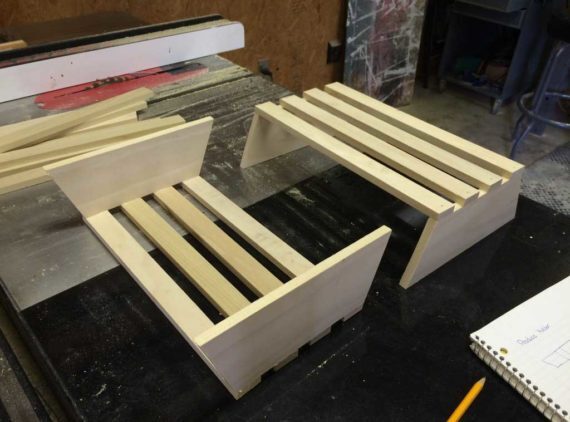
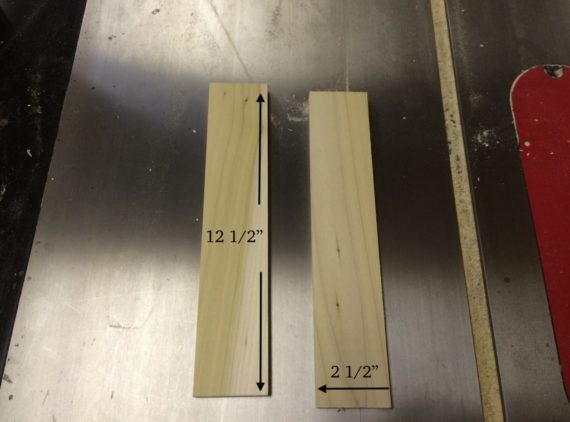
Once you finish cutting the slats to length, attach them using glue and a brad nailer. Start with the bottom then move to the sides. Once this is done, they need to be attached one on top of the other. The key here is to make sure you figure out how far apart they need to be so that you can reach everything in the bottom shelf. We decided on 12 1/2″. Using this measurement, we cut down a board to 2 1/2″, then cut down two lengths of 12 1/2″, as shown below.
After doing this, use glue and screws to attach both baskets together. As you can see in our finished product, we used four on each joint to make sure it was secure.
Step 4: Finishing

This model is finished with raw linseed oil and beeswax polish. Now it’s time to enjoy the extra colour in your kitchen provided by this neat looking produce rack!
Related Posts
Post a Comment