
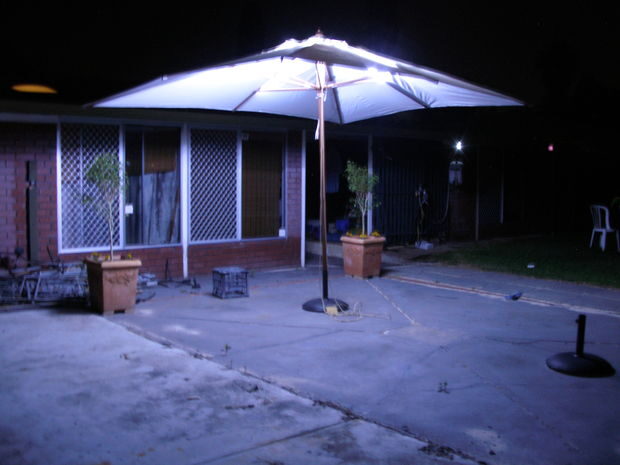
Most of us have a love for outdoor entertaining. While it can be easy to entertain during the day, entertaining at night can be problematic if you don’t have the right lighting available. With outdoor areas, not everyone can have a custom-built pergola to provide shade and lighting solutions, and in many cases, something removable is required to ensure the space can be multi-purposed. If you are looking for a more cost effective option or a solution which is portable so you can better utilise all corners of your outdoor living space, an outdoor umbrella light could be a good option for your home.
One of the most practical elements of this style of lighting is that it runs from its own rechargeable battery source, rather than a power outlet in your home. This removes the need for large extension cables, which are trip hazards.
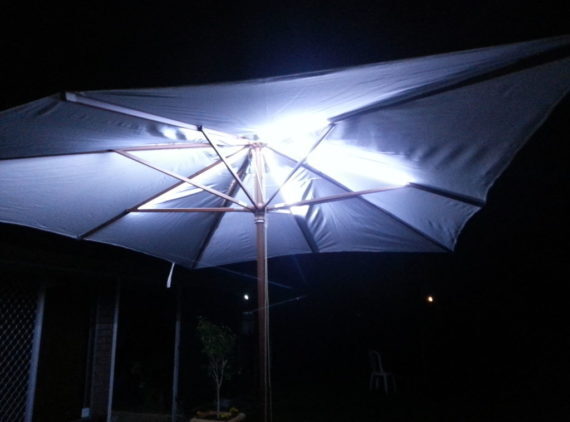
When selecting your umbrellas for this project, consider using a lighter umbrella as the light will be brighter and reflect from the lighter colours more effectively.
Materials for your outdoor lighting umbrella:
- 2 x Umbrellas 3m x 4m
- 2 x 5M LED flexible strip lights
- 2 x 5 in 1 splitter power cable
- 10 X 10 mm PCB board connector clip with DC female
- 1 x 5m x 5.5mm power extension cable
- 1 x 3m x 5.5mm power extension cable
- 2 x DC male & DC female 2 pin connector for LED light strips
- 12v – 7AHr rechargeable battery
- Red and black electrical wire
In this project it is important to remember you are working with batteries and power, so make sure you are working with quality materials, and you are also working in a dry and safe area free from water. Also, ensure your work area is well lit and if you are concerned about doing any work with batteries or power you ask a mate for help.
Step 1 – Connecting the battery
Firstly, connect your DC male two pin connectors to the red & black wires, red to positive (+) and black to negative (-), then take the wires to your 12v battery and connect.
Step 2 – Prepare the lights
With the LEDs there are several places where cuts or incisions can be made – denoted usually by a scissor mark or indentation in the wire itself. In addition to this, there is a mark outlining which is positive (+) and which is negative (-) to ensure your wires are not crossed.
Cut the light strips into one-metre lengths and attach the five individual lengths to the five x 10 mm PCB board connector clip with a DC female end. Ensure that you match up the positive (+) and negative (–) and close the clips tight.
We have selected five individual lengths, however, if your umbrella has more arms, you can, of course, select as many as you require. You may just need to purchase more LED lights.
Connect these strips into the 5 in 1 splitter power cable. It is now time to test your creation before you go and attach to your umbrella. If it lights up like a Christmas tree, then you are on a winner, however, should there be any wires crossed or in the wrong clip then you may need to check that everything is aligned in terms of the positive (+) and negative (–) signs.
Take the time to do this step properly as it is the basis of the project if you muck up just start again and take your time.
Step 3 – Attach lights to your umbrella
Firstly start by opening your umbrella, or you may have some problems. If you are a little short, then it may serve you well to firstly lay the umbrella on the ground to make things a little easier.
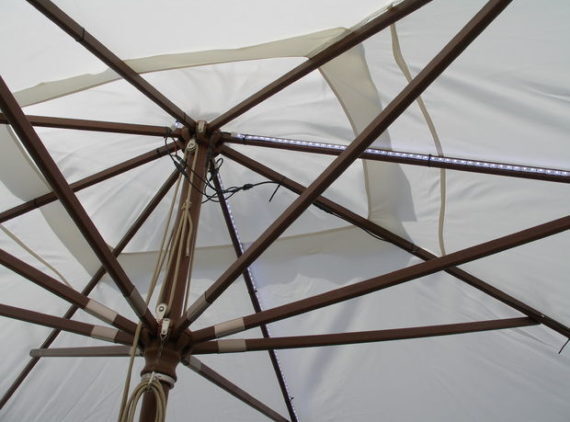
Unplug your splitter, which will allow you to have each 1m section of LED strip to attach to the arm of your umbrella.
Using the tape, place the tape on the beam, then affix your LED strip. When you are happy with the position, and then use zip or cable ties to hold the LEDs in place. Pull the zip tie tightly and cut off the loose ends to tidy up.
Step 4 – Plug in and enjoy your new outdoor umbrella lighting

With all the strips attached, plug back all the strips into the 5 in 1 splitter and using the trusty cable tie, affix the splitting to the umbrella, so there is no chance of it getting caught on anything.
Using an extension cable to plug into the 5 in 1 splitter, zip tie this to the umbrella. Finally, add a simmer before plugging your cable into the DC male connector. This will allow you to control the brightness from a lower position, rather than having to reach up all the time to change the brightness of your lights – a nifty little trick.
With this done, put the umbrella back in the base and enjoy outdoor living both night and day.
Whether you have a small DIY project or a big one, we have the tools you need to get the job done. Listing tools is easy!
Do you own a bunch of tools at home, gathering dust that you hardly ever use? Instead, you should be letting them make you money by renting them out to people in your area. With ToolMates Hire you can now hire your own tools out whenever they’re not in use.
Simply register, add a tool, details and photo, add the dates the tool is available and confirm, and your tool is listed on ToolMates Hire as available.


Leave a Reply