

Tuck medium and lightweight stuff onto shelves suspended from the ceiling. The shelves are designed to fit into that unused space above the garage doors (you need 16 in. of clearance to fit a shelf and standard 12-1/2 in. high plastic bins). Before building your suspended storage, make sure your garage has industrial doors that can handle the extra overhead weight without compromising operation or safety. However, you can adjust the shelf height and put them anywhere. The only limitation is weight. We designed this 4 x 6-ft. shelf to hold about 75kg., a load that typical ceiling framing can safely support. It’s best to save the shelf for “deep storage,” using labeled bins with lids, because you’ll need a stepladder to reach stuff.
Now attach the corner braces on both ends of a shelf support to the center of a joist/truss by drilling pilot holes and using 1/4-in. x 2-in. hex head lag screws (Photo 2). The only challenge is finding the center of joists through a drywall ceiling (if your ceiling is finished) to attach the shelf supports. Tap a small nail through the drywall until you locate both edges of the joist. Measure to find the center of the adjacent joists, and measure to keep the three supports in alignment with one another. Finish the shelf unit by attaching a 3/8-in. x 4-ft. x 6-ft. plywood floor (STEP 3).
Here is a list of Tools / Equipment needed to create this Suspended Storage for your Garage:
- 2″ x 4″ inch timber x 8
- Cordless Power Drill
- Circular Saw
- Hex head Lag Screws
- Wood Drill Bit (to per-drill the wood so it doesn’t split)
- 5″inch Corner Braces x 12
- Measuring Tape
- 1 Sheet of 1/8 inch ply
- 8 containers 16 in. wide x 24 in. long x 12-1/2 in. high.
- 2m Ladder
- Stud Finder
| STEP 1. nMeasure from the ceiling to the top of the raised garage door. nSubtract 1 in. to determine the height of the side 2x4s. 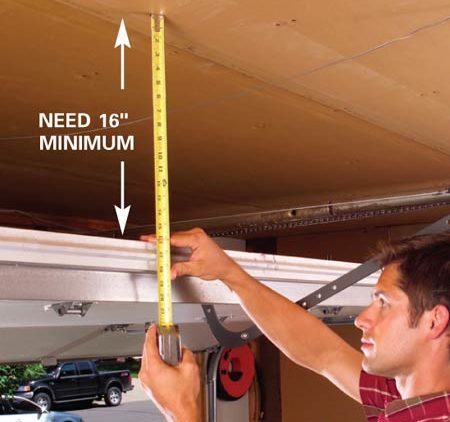 |
STEP 2. nBuild three identical shelf supports, align the side supports, nalign the side supports, and predrill and lag-screw neach into the center of the ceiling trusses/joists. 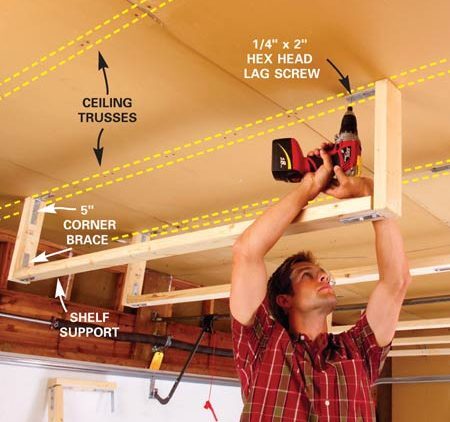 |
| STEP 3. nCut 3/8-in. plywood for the shelf base and attach it to the n2×4 shelf supports with 1-in. wood screws. 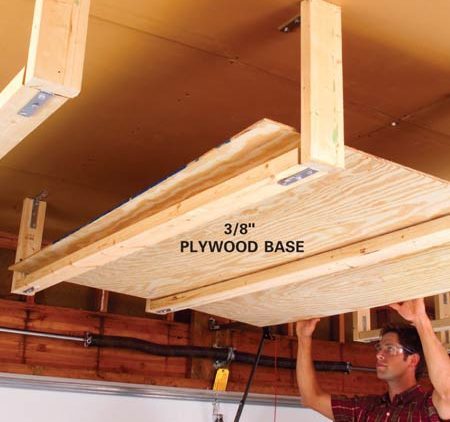 |
FIGURE A. nThis is the shelf support detail nso that you can see how each shelf support is built nyou need to make 3 of these. 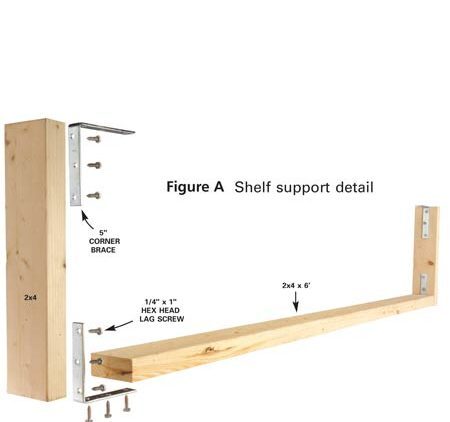 |
| STEP 4. nEach shelf holds eight containers 16 in. wide x 24 in. long x n12-1/2 in. high. 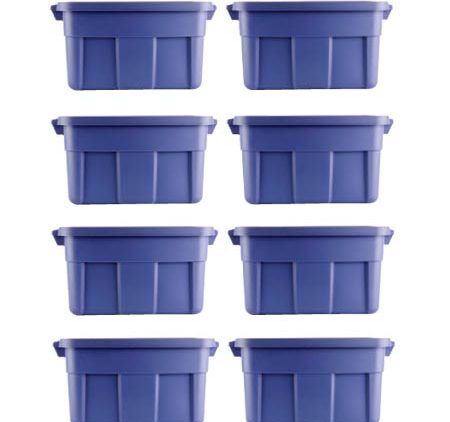 |
Don’t overload the Storage Boxes nDon’t overload bins with heavy stuff. Limit the total weight nto about 75kg. nSo don’t overload the storage boxes. 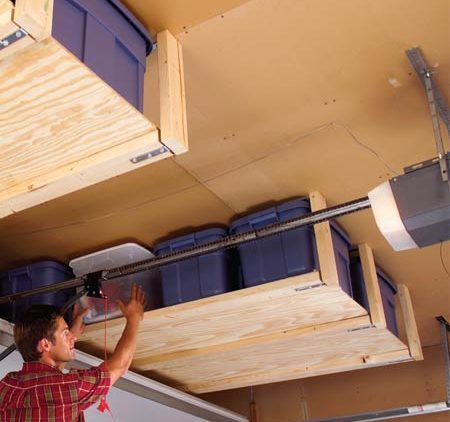 |
Related Posts

Post a Comment